Resources
Workshops
Our Facilities
Help
Resources
Workshops
Our Facilities
Help
This is an old revision of the document!
Instructions of using the Laser Cutter
In order to use the laser cutter first, you should receive the security and instructions briefing. This laser cutter is operated with computer number 1 that has installed in it CorelDraw. The username and password are provided by the staff.
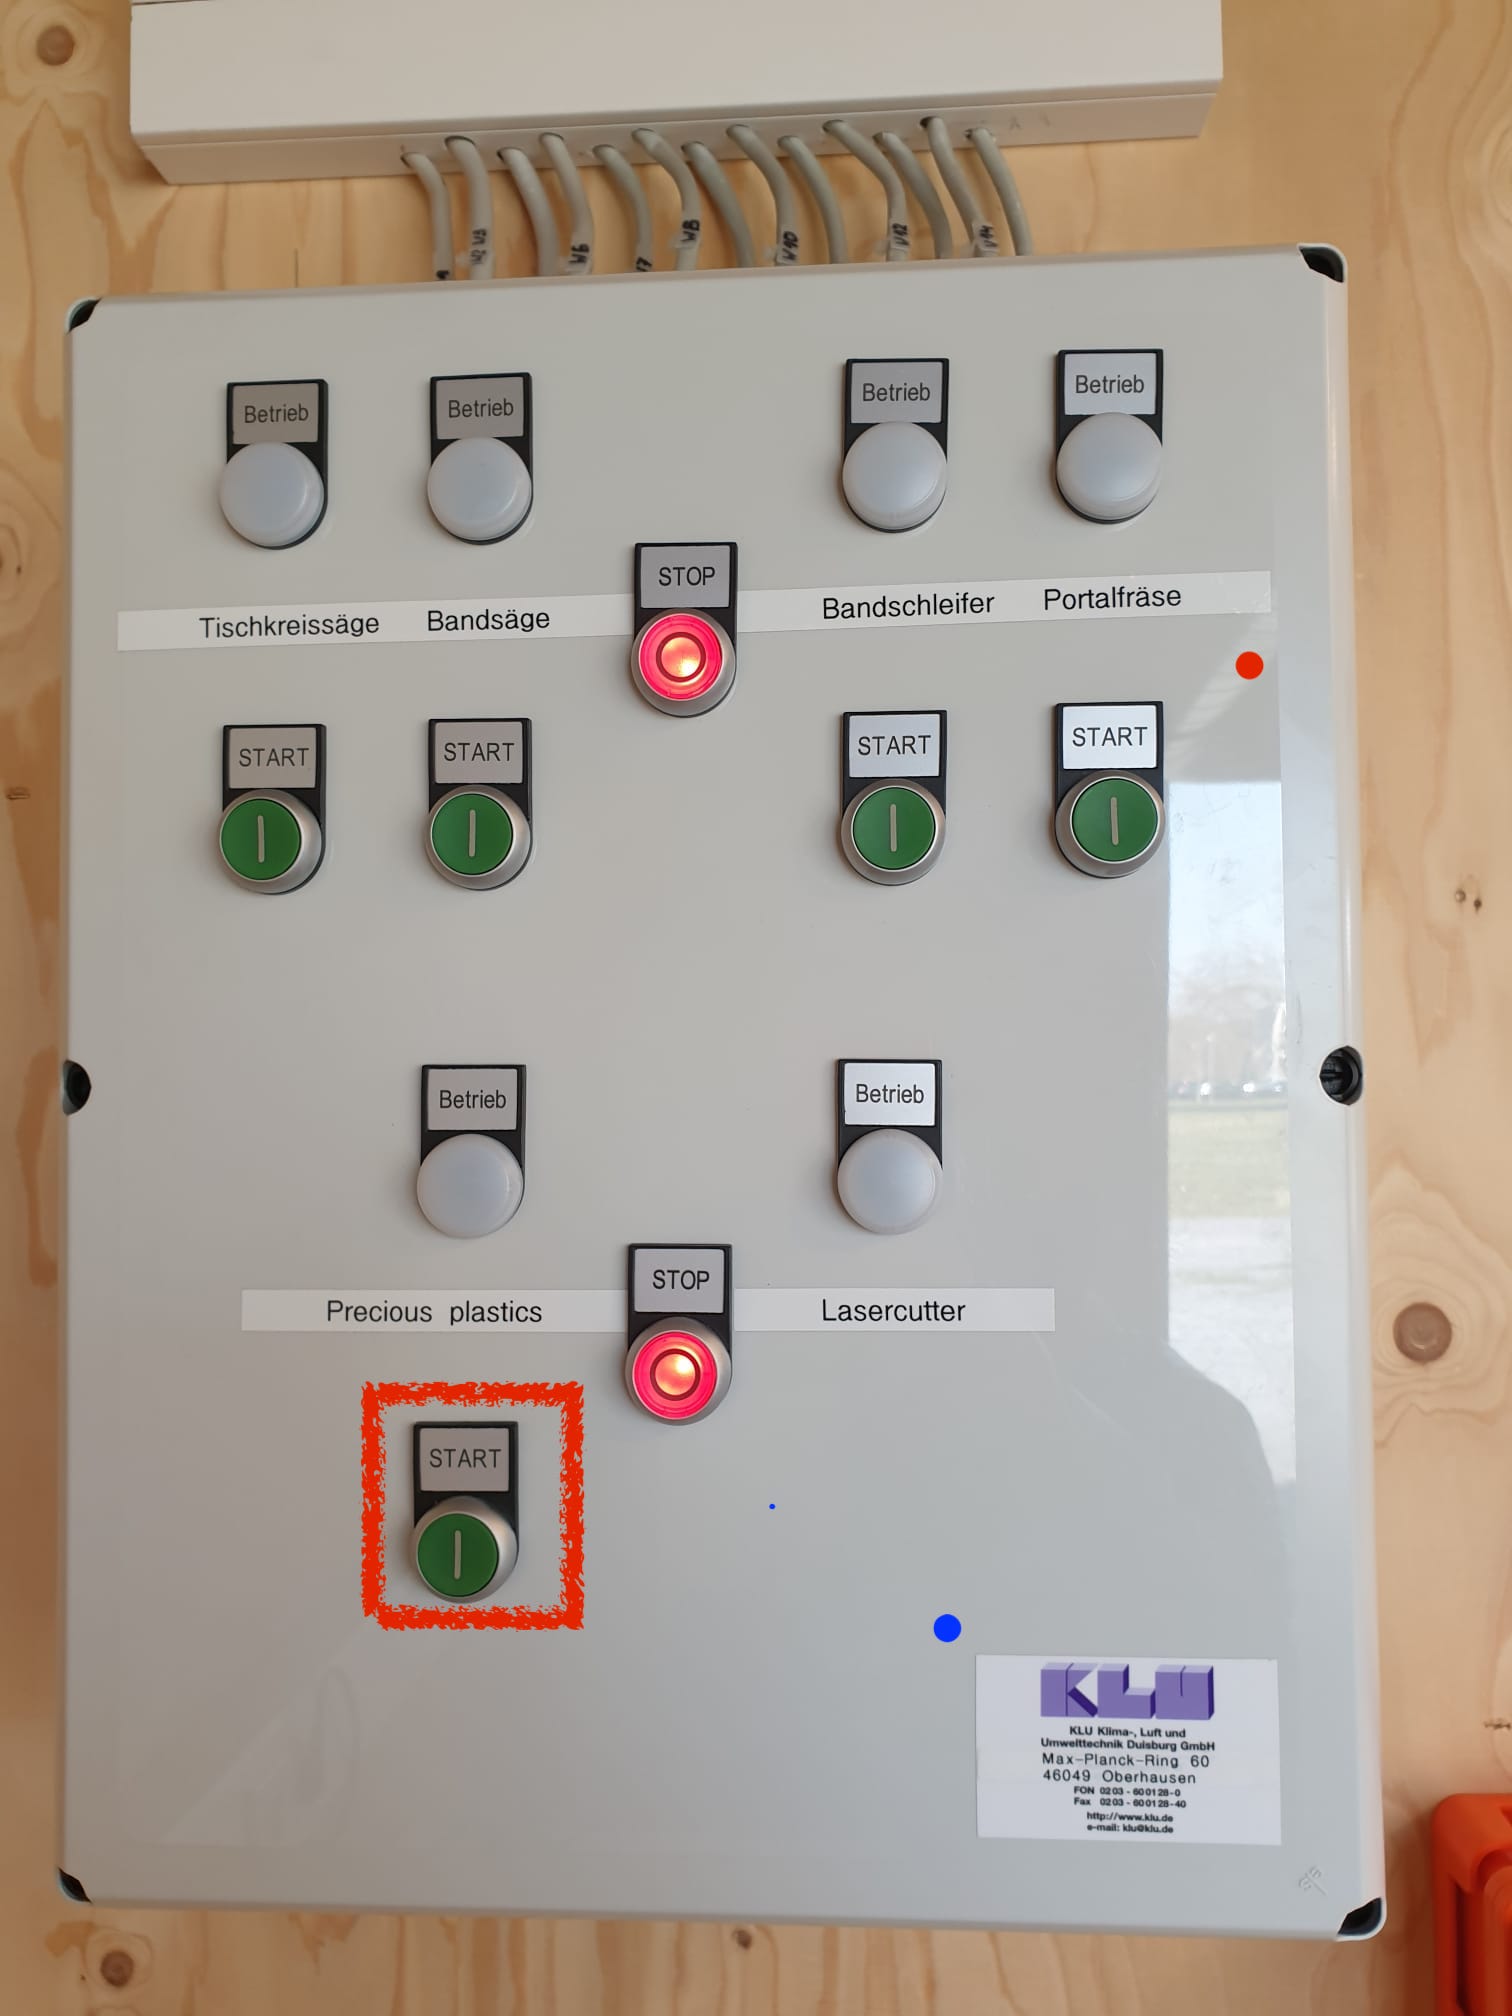
The first thing to do before starting to operate the laser cutter is to activate it in the control panel by pressing the bottom left button. The control panel can be found on the right wall parallel to the laser cutter.
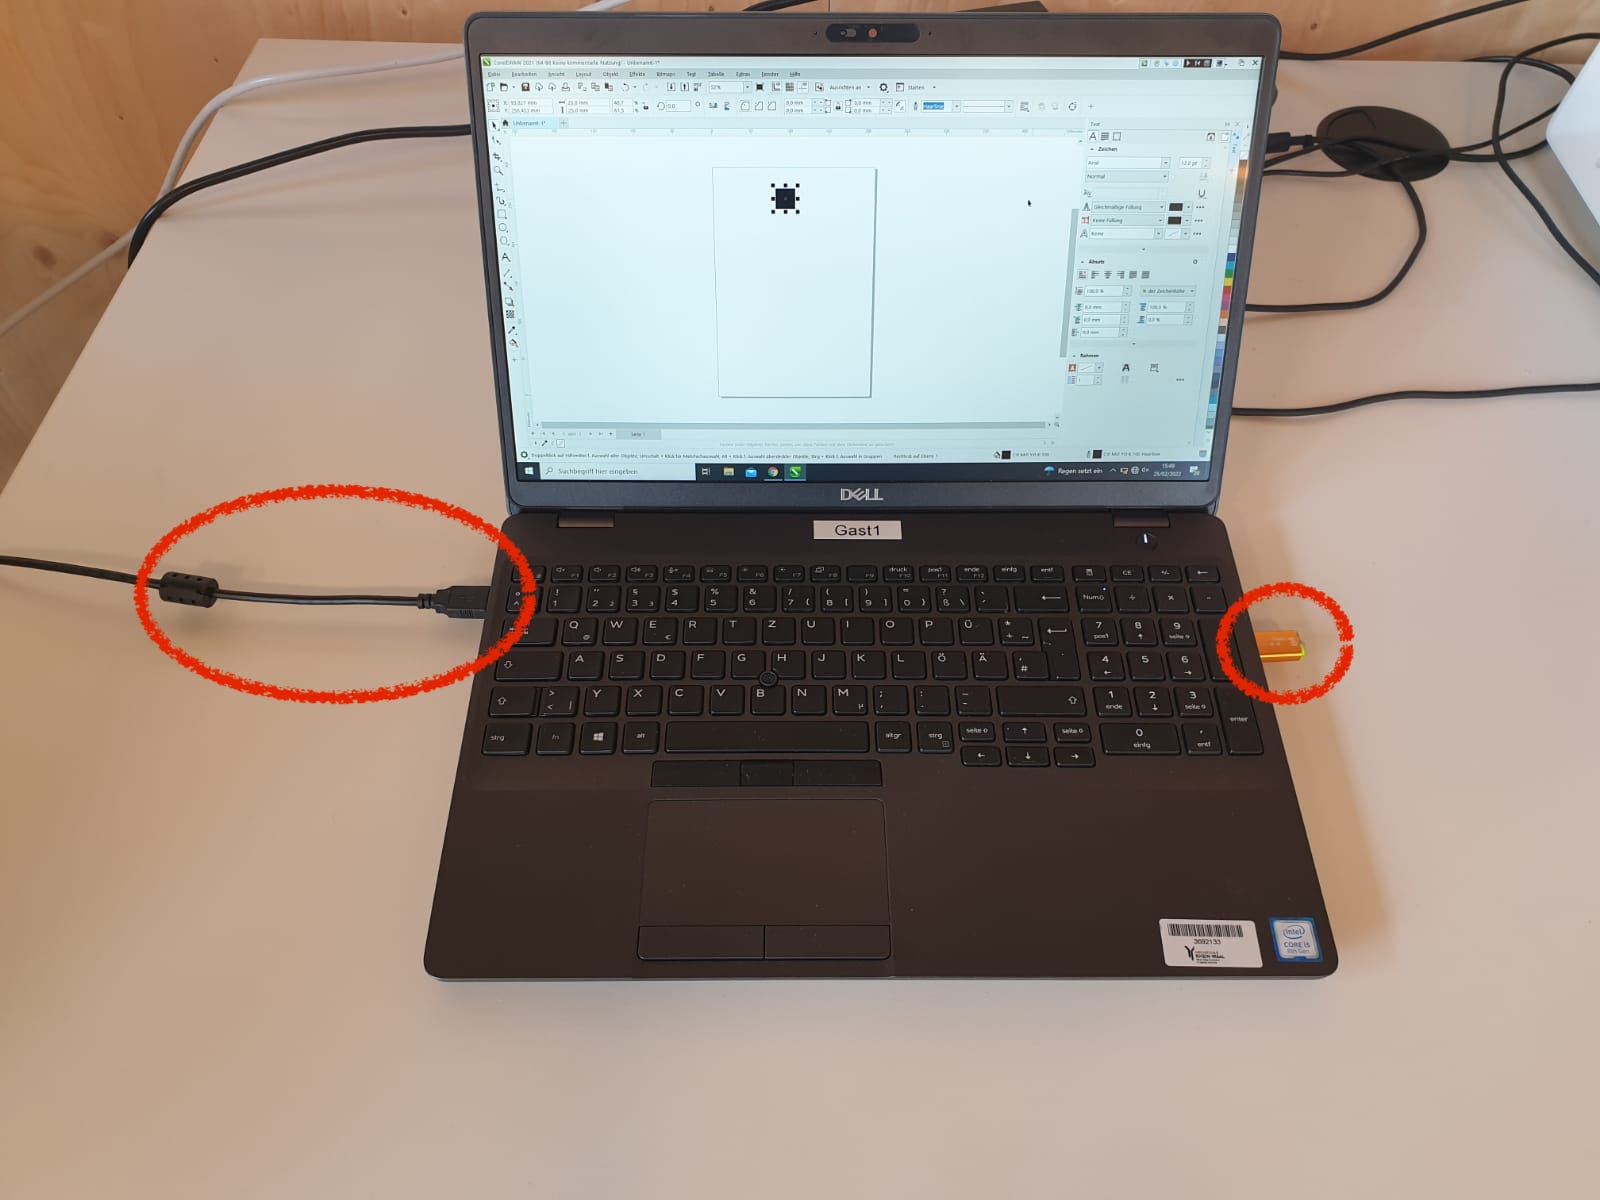
After that, a special USB stick has to be attached to the laptop (as without it, a failing error occurs when sending prints to the laser cutter) and the cable of the laser cutter itself.
As these are set, it is time we either insert a file (dxf, dwg files recommended) to CorelDraw or create our file directly in the software. Either way, we prepare our file for cutting/engraving depending on the design, opening the following software:
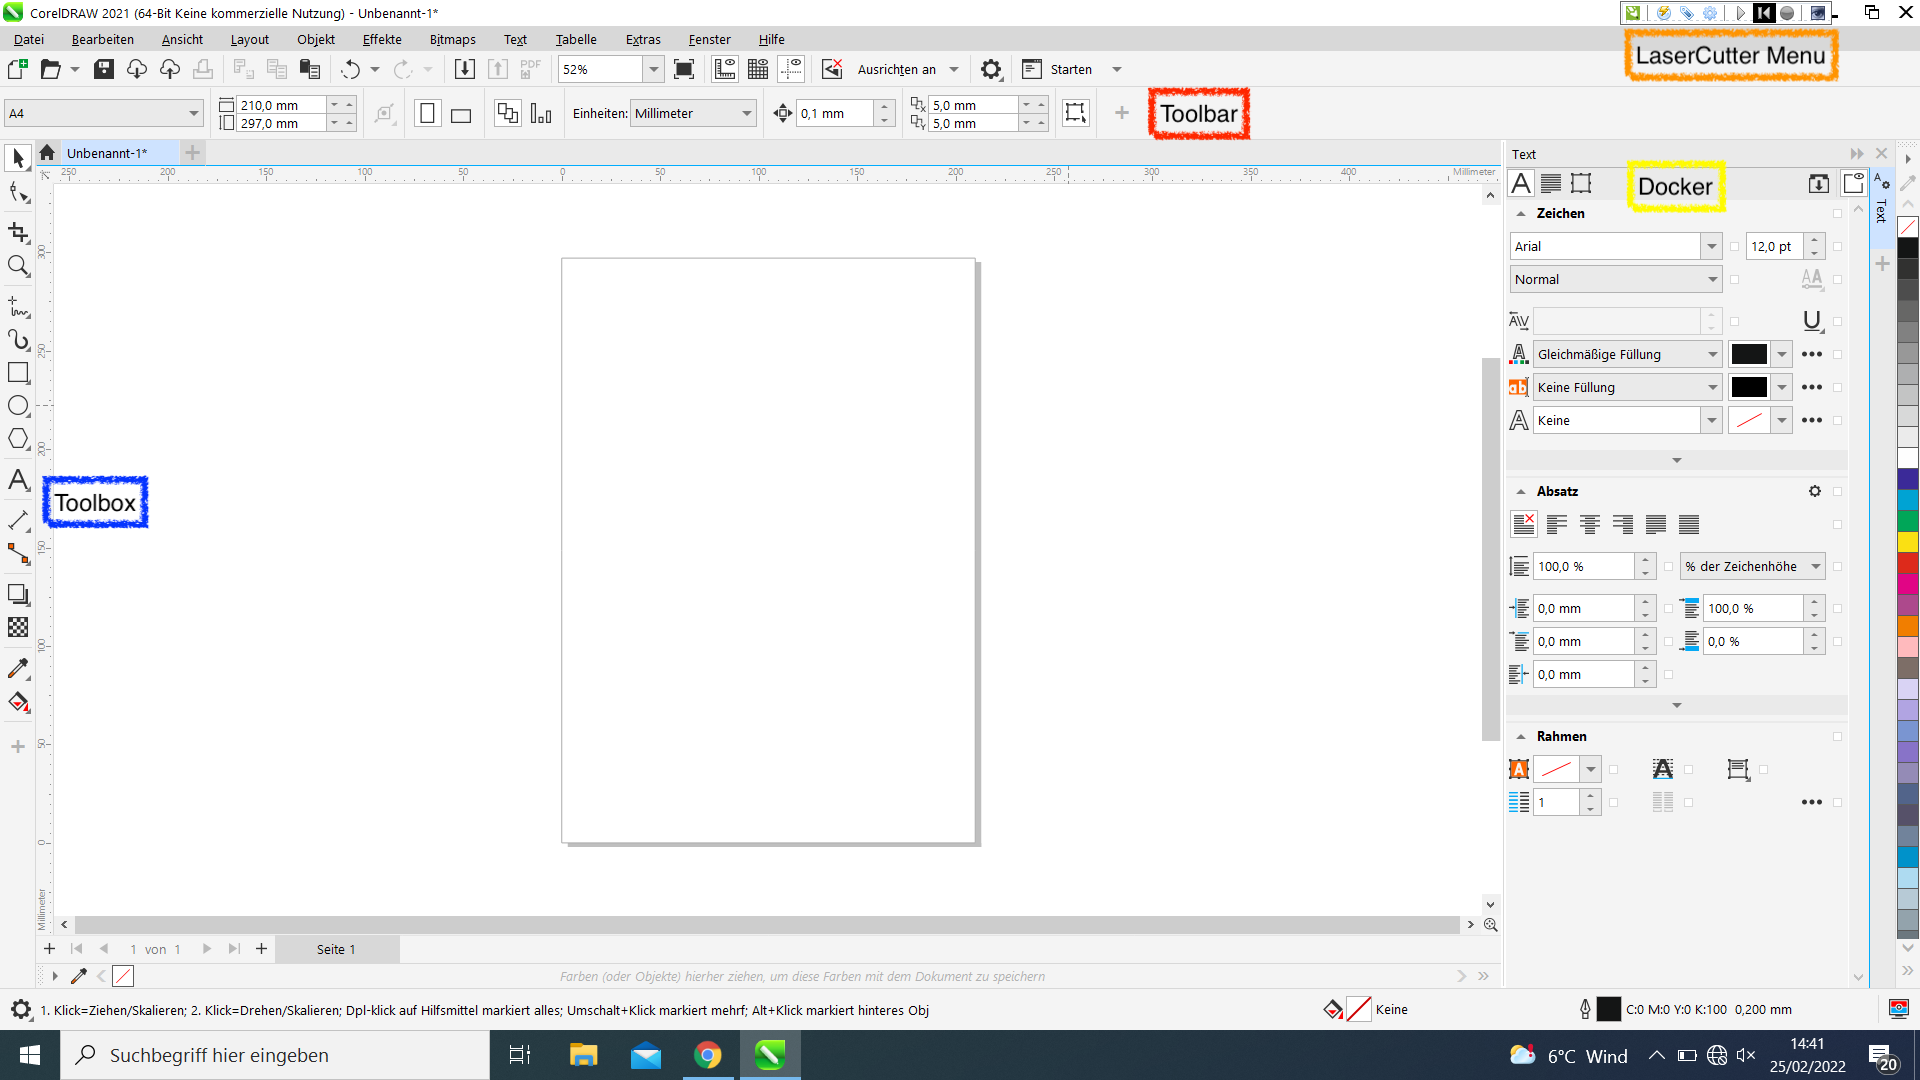
For the sake of the testing of different materials, a small rectangle cut and engraving were done. So, below are the examples that will be provided. What we will mainly be working with when using Coreldraw are: the toolbox(blue), which provides tools for creating and modifying objects in the drawing, the toolbar(red), which contains shortcuts to menu and other commands, the docker(yellow), which is used in case our drawing is complicated and needs layering and finally the laser cutter menu for setting the parameters of the cut/engraving and send the job to the laser cutter. For a complete guide to Coreldraw, this link is very helpful: Corel Draw Guide