Resources
Workshops
Our Facilities
Help
Resources
Workshops
Our Facilities
Help
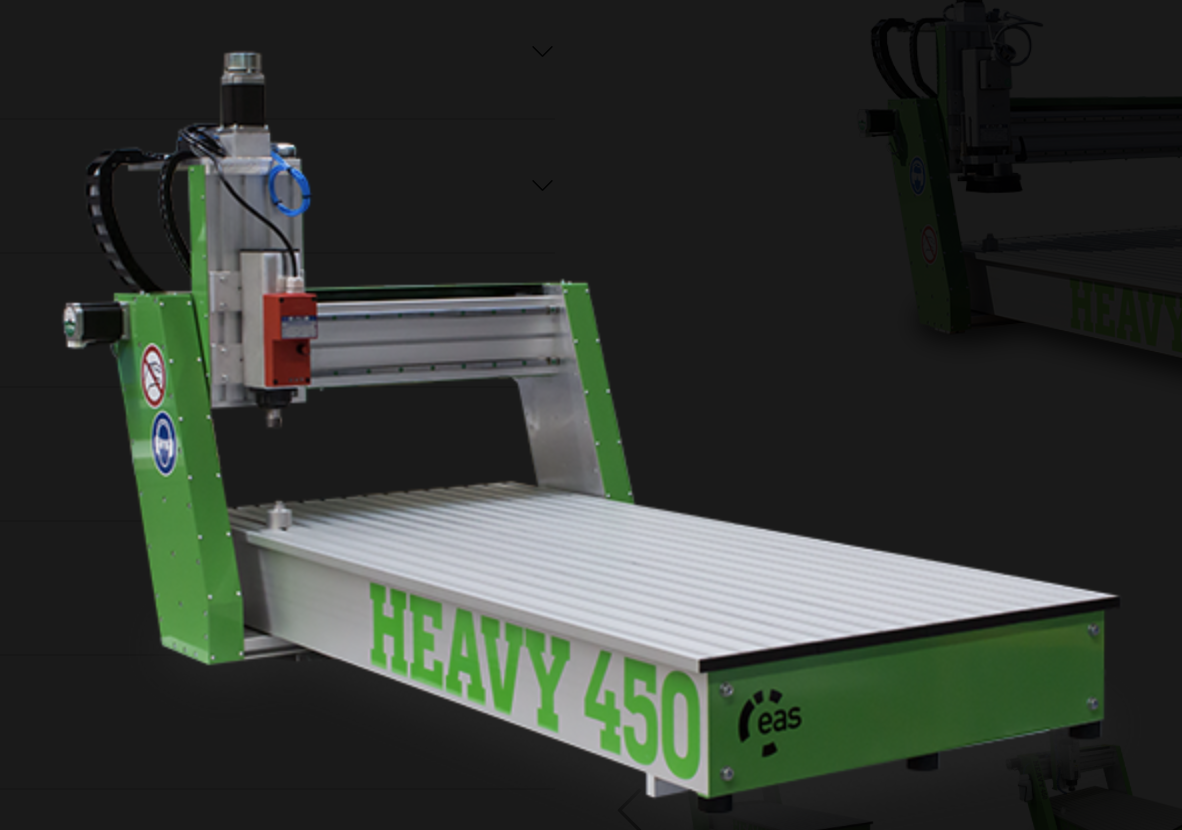
The CNC machine in use in the GFL is the eas Heavy 450.
Before the use of the machine, a design is necessary. For the following design and process, Fusion360 was used. The steps to be taken in using the machine are:
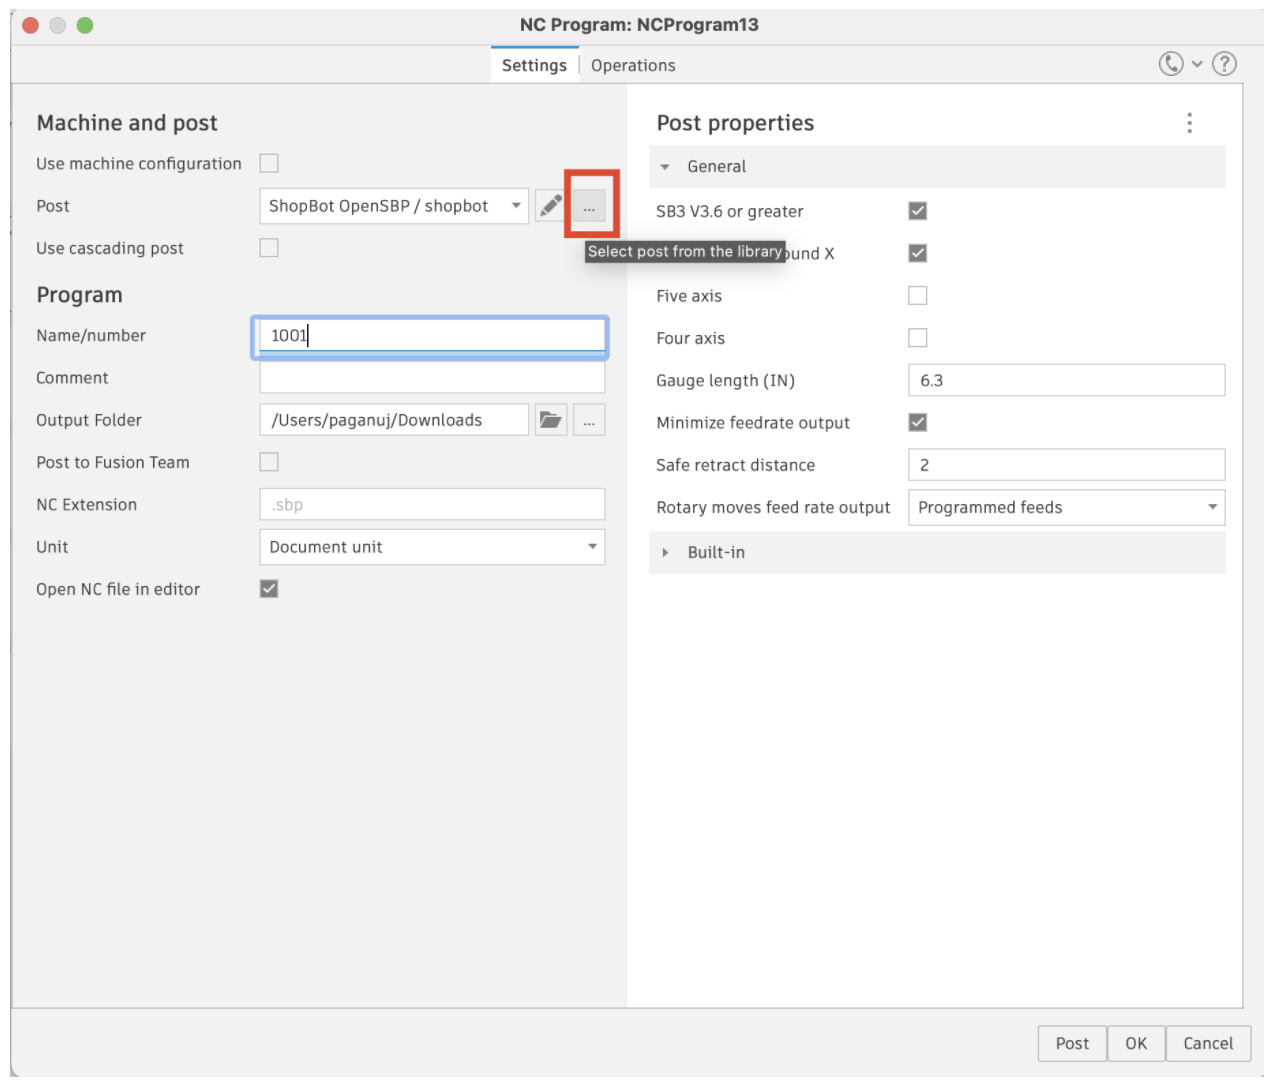
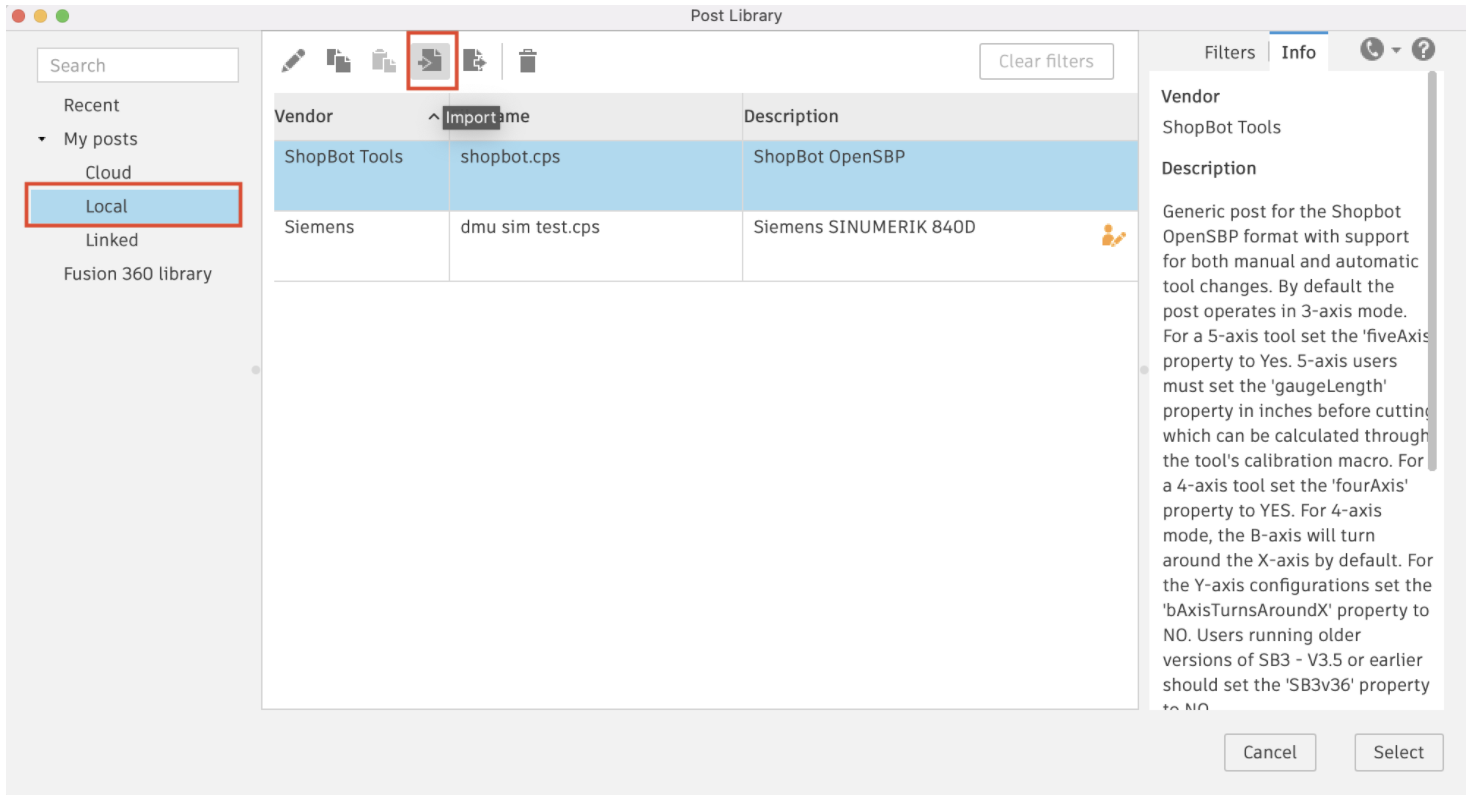
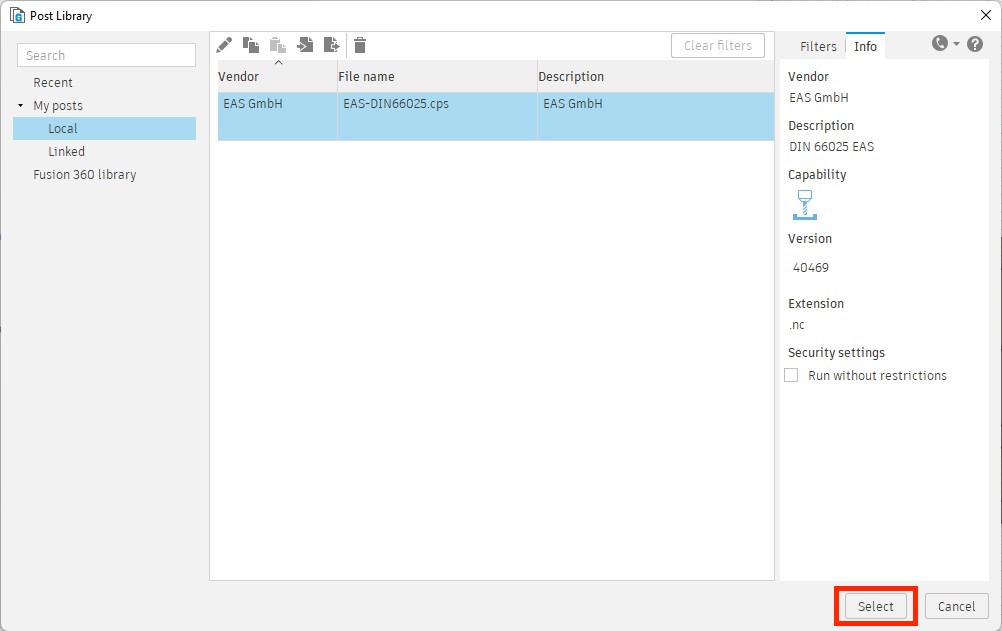
The steps to be taken for the installation of the Post Processor for EAS HEAVY 450 are the following:

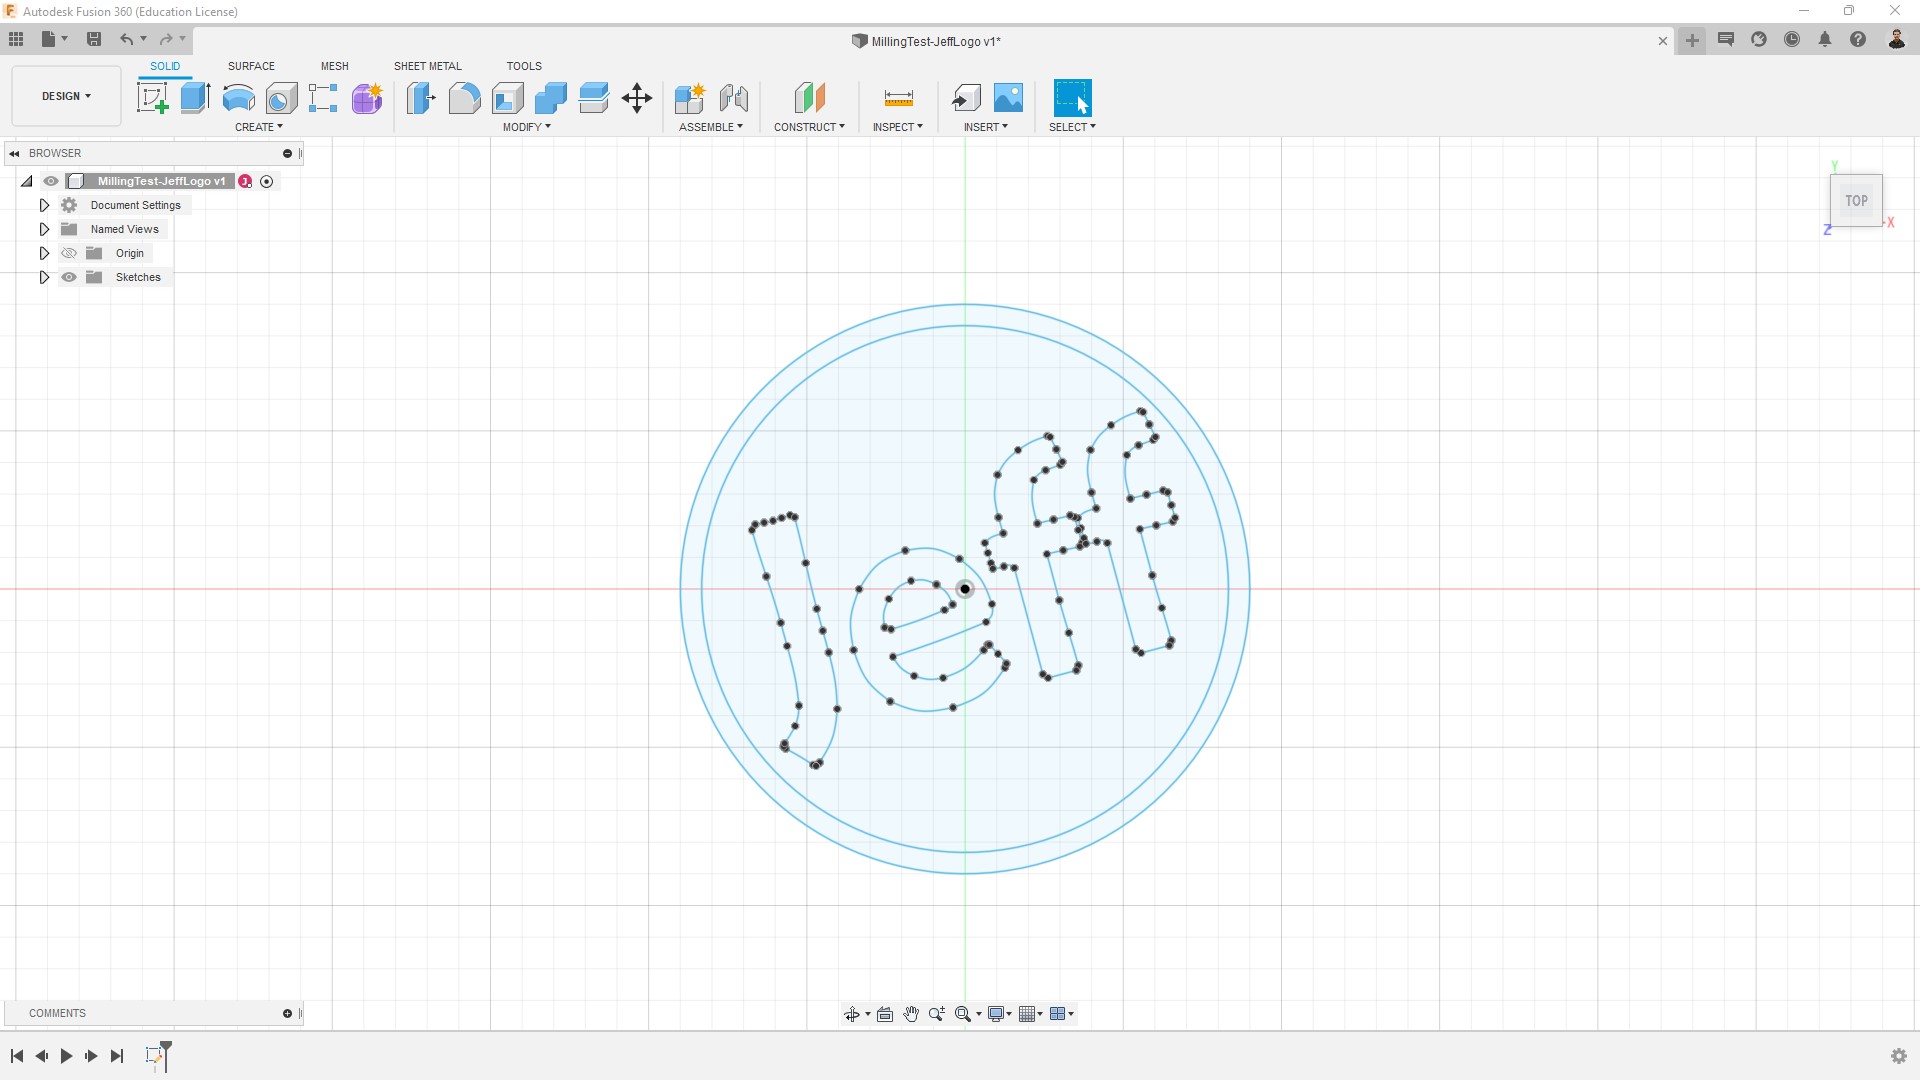
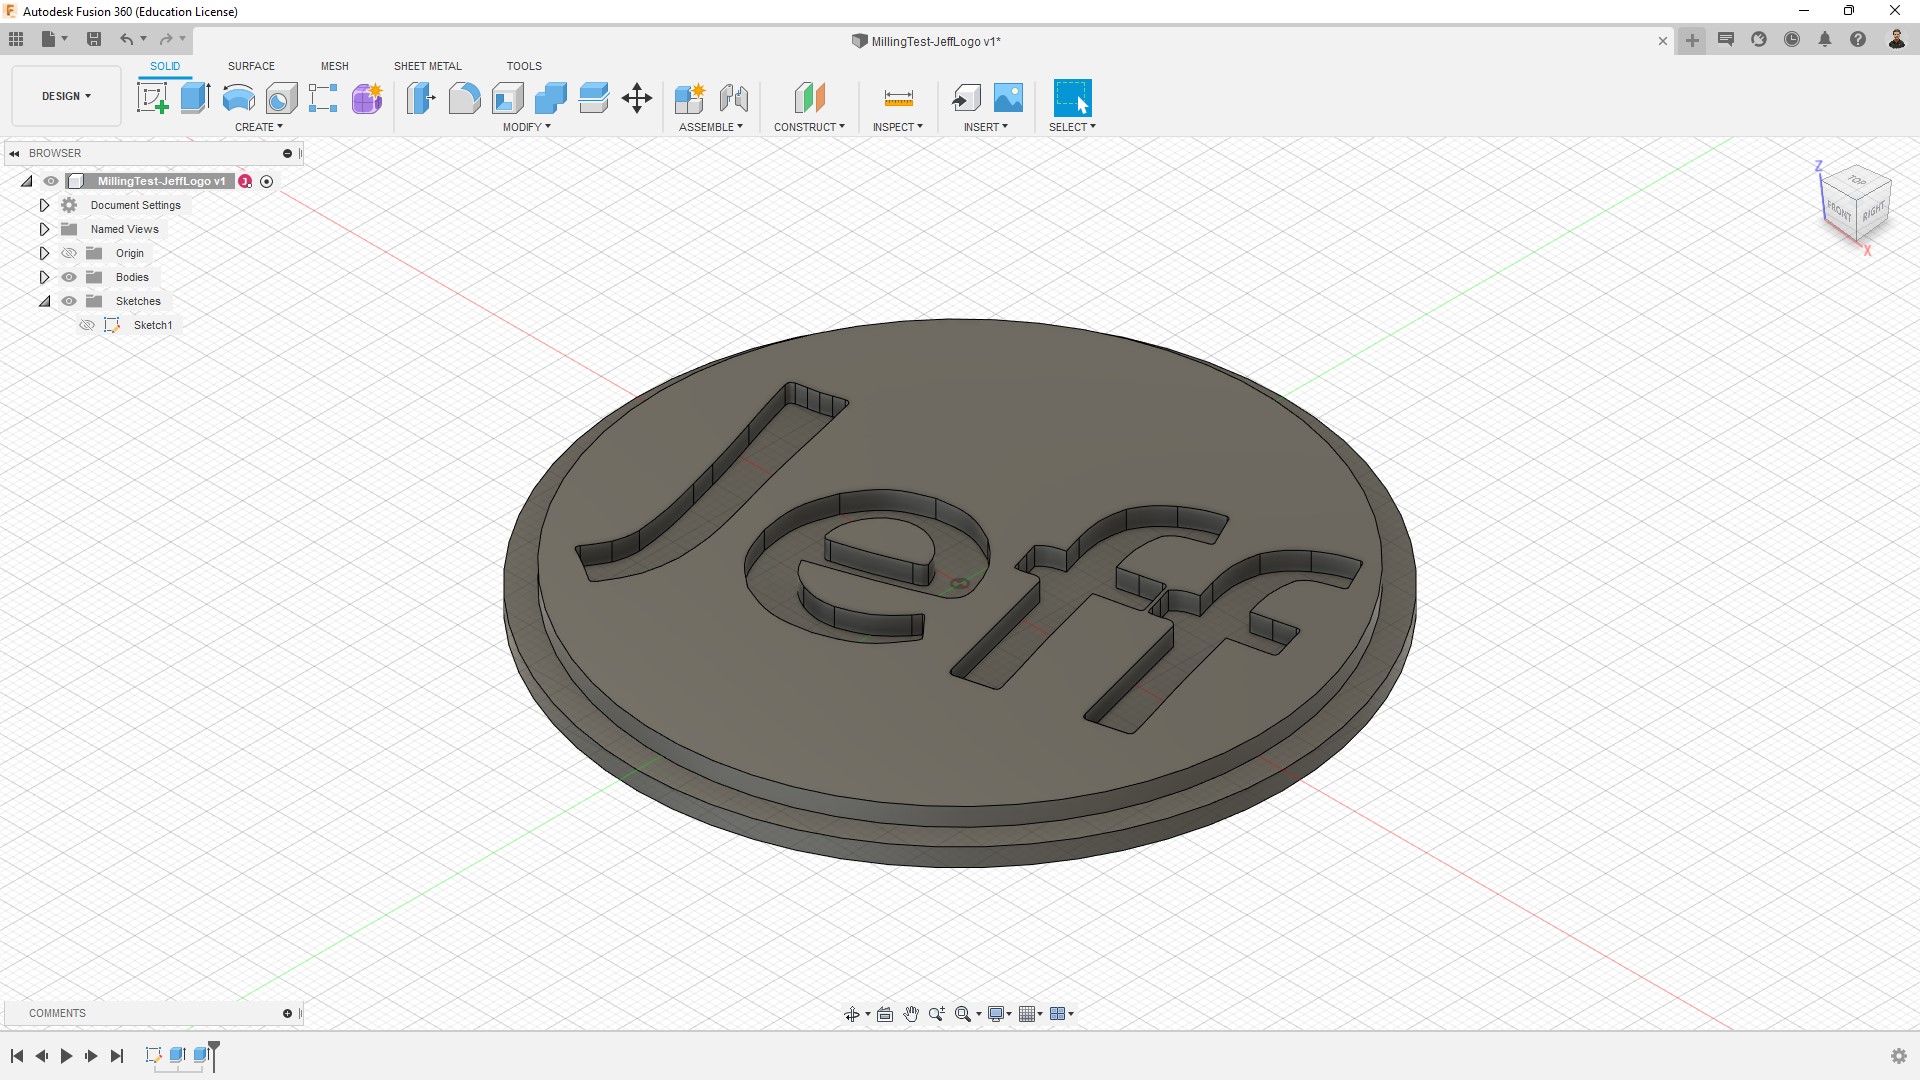
After the installation of the Post Processor, we can proceed with the design that we wish to cut. In Fusion360, in the Design environment, we use the sketch tool to design the following design and the extrude tool in order to give our design essence and eventually be able to cut it in the CNC machine.
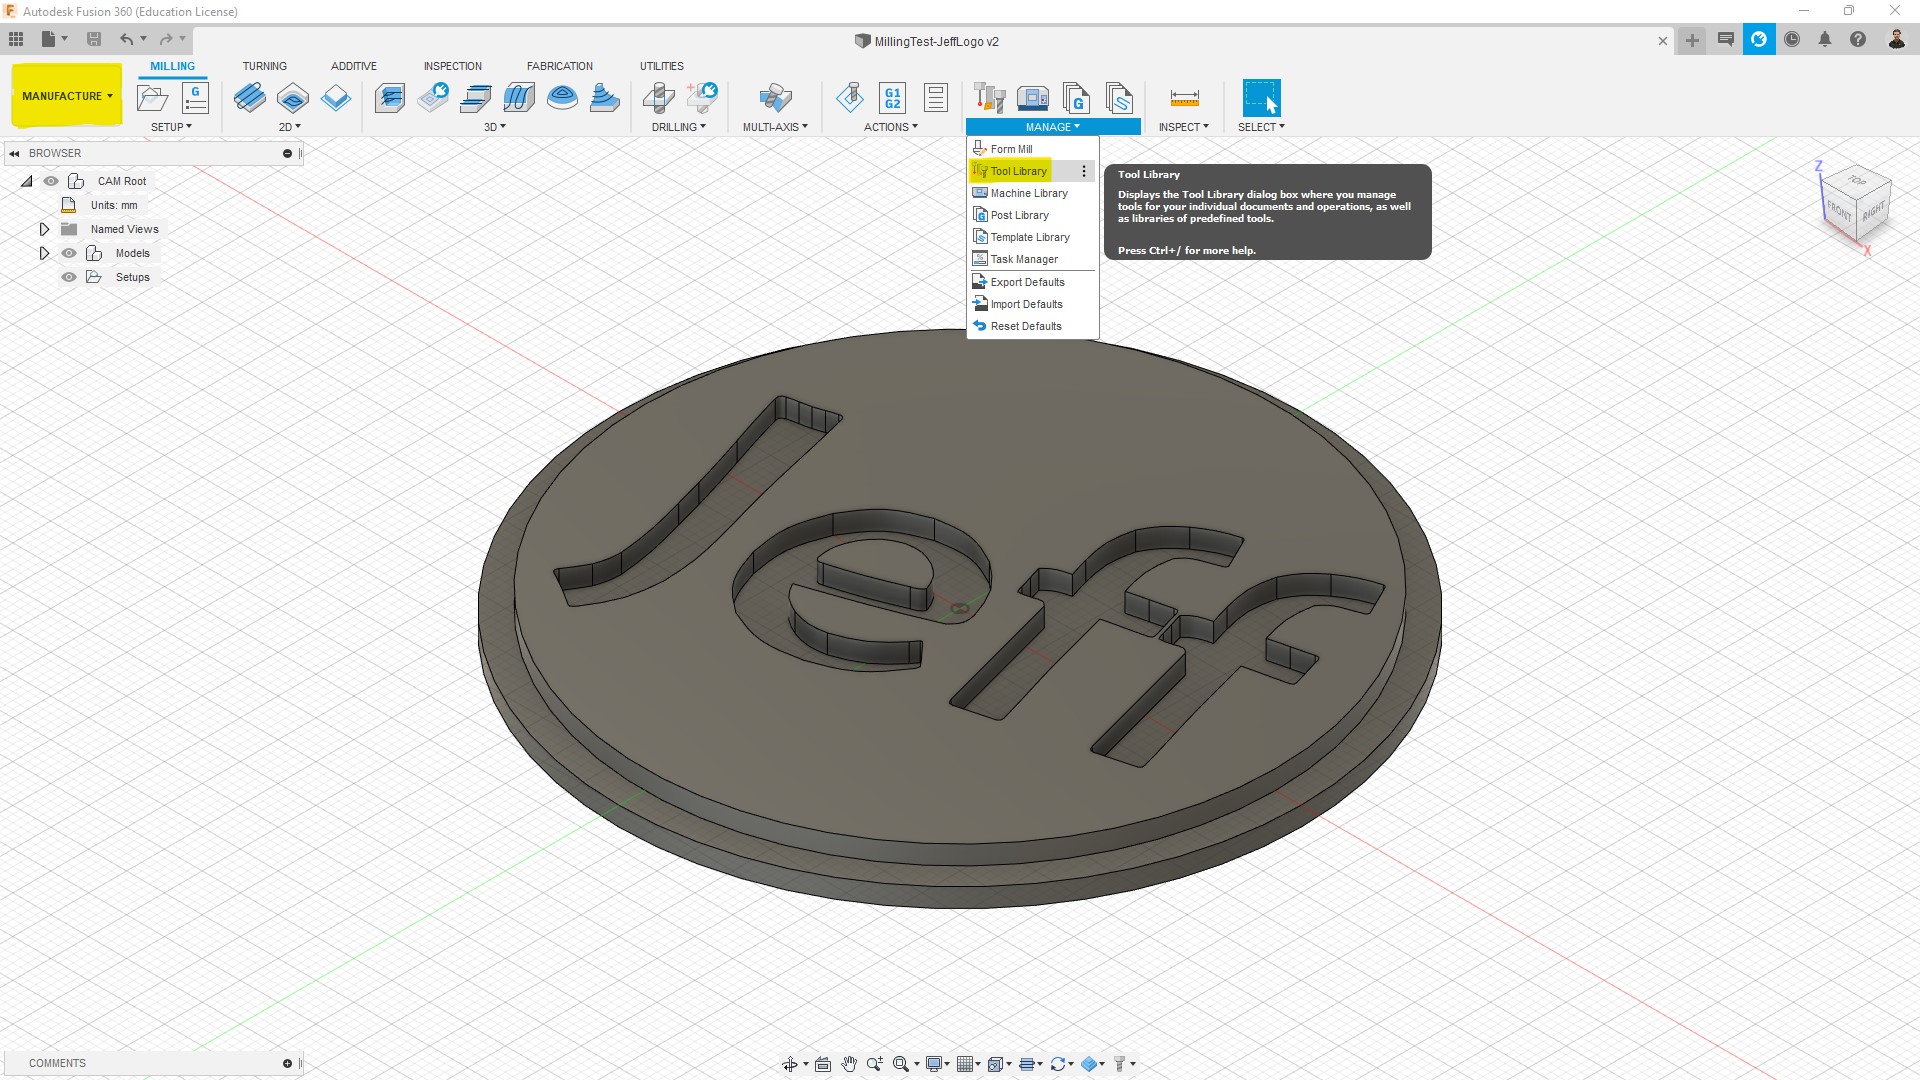
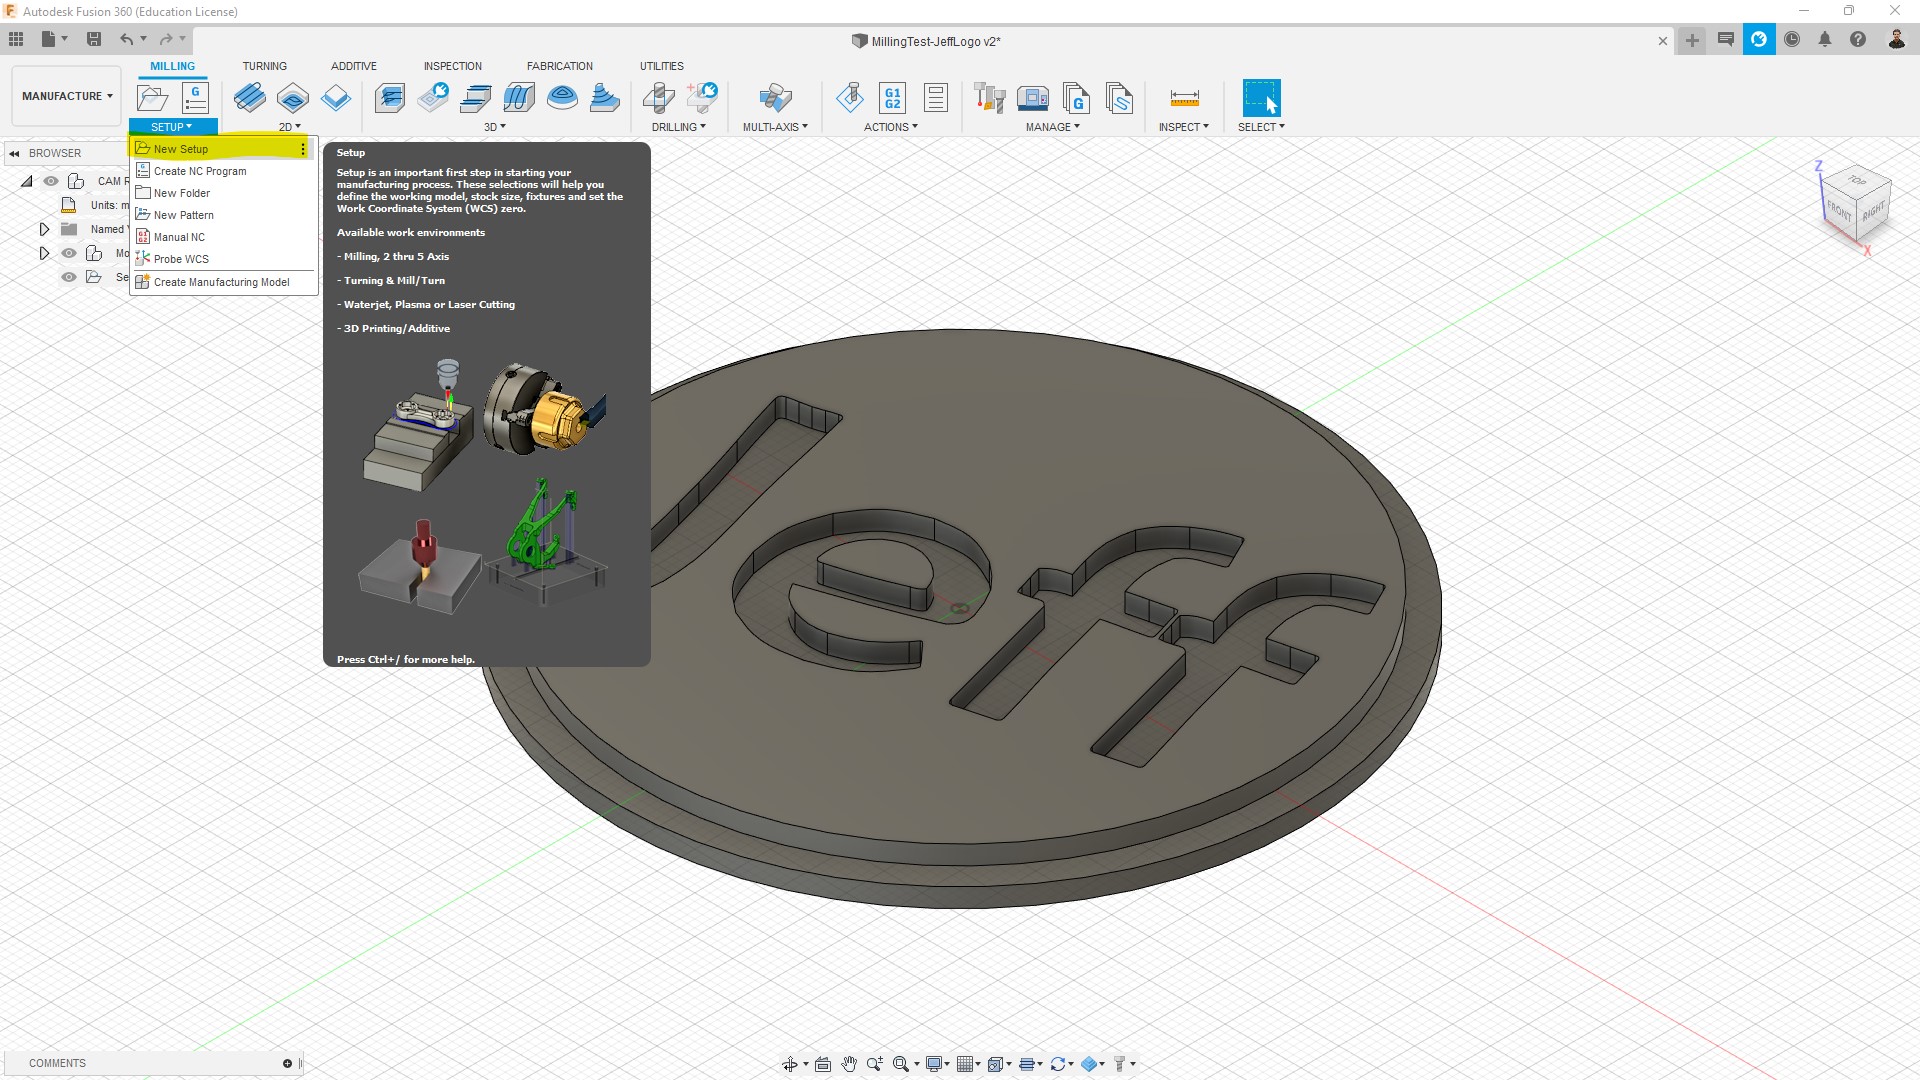
After we have the design we wish to cut ready, we go to the Manufacture environment and insert the configuration of the milling bit which we have in use or we will use in the CNC machine. In order to insert the milling bit, we follow the steps below:
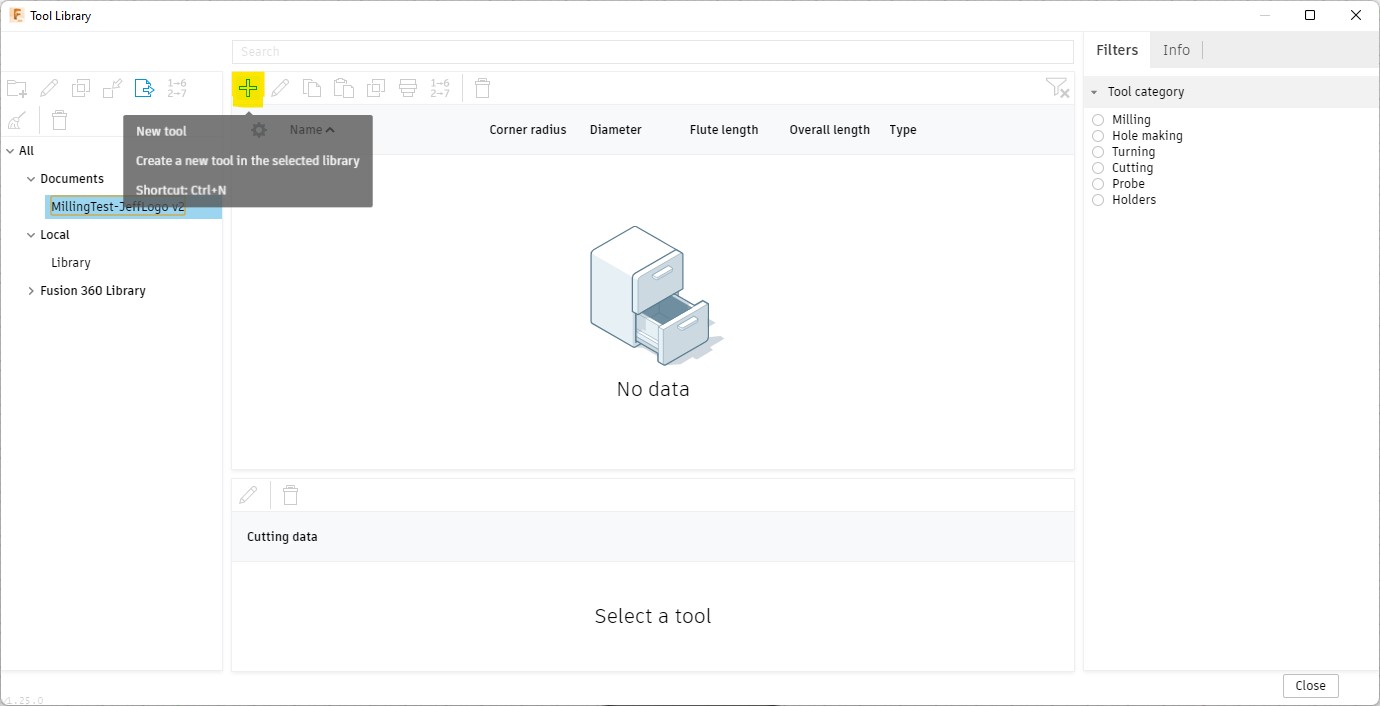
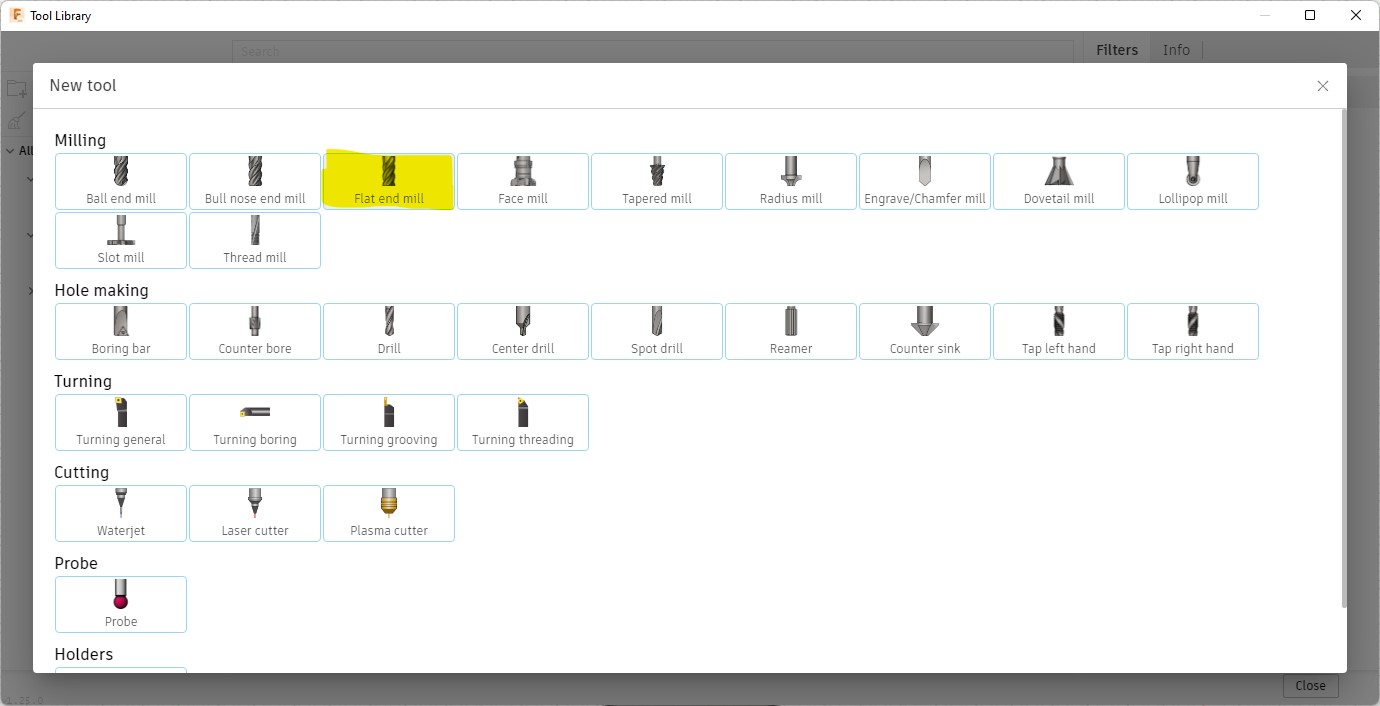
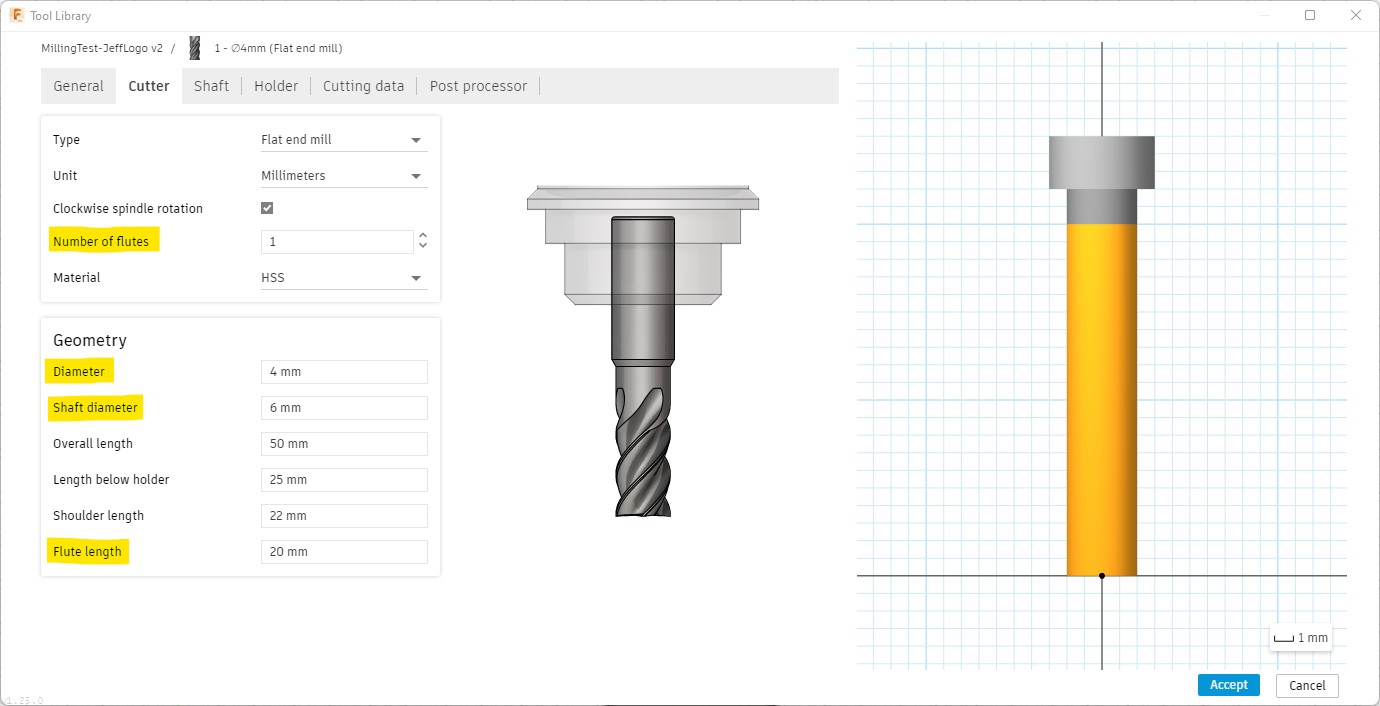
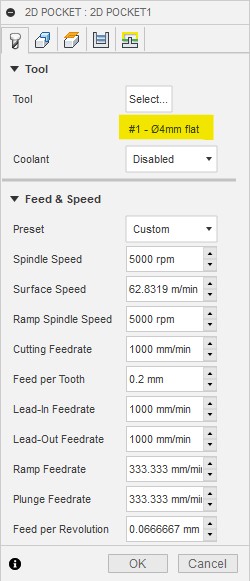
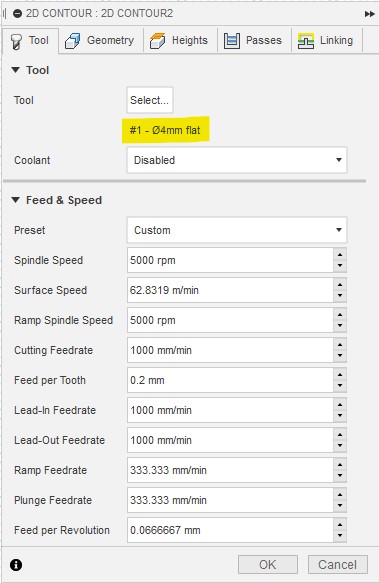
After pressing the New Tool button, we have to insert the configuration of the milling bit in use. If we do not know it beforehand through a datasheet or otherwise, we have to measure and count the flutes, the diameter of the shaft and the milling bit etc. An electronic caliper comes in handy in this situation. In our CNC, for this design, we were using a 4mm diameter flat end mill and inserted it in Fusion as follows:
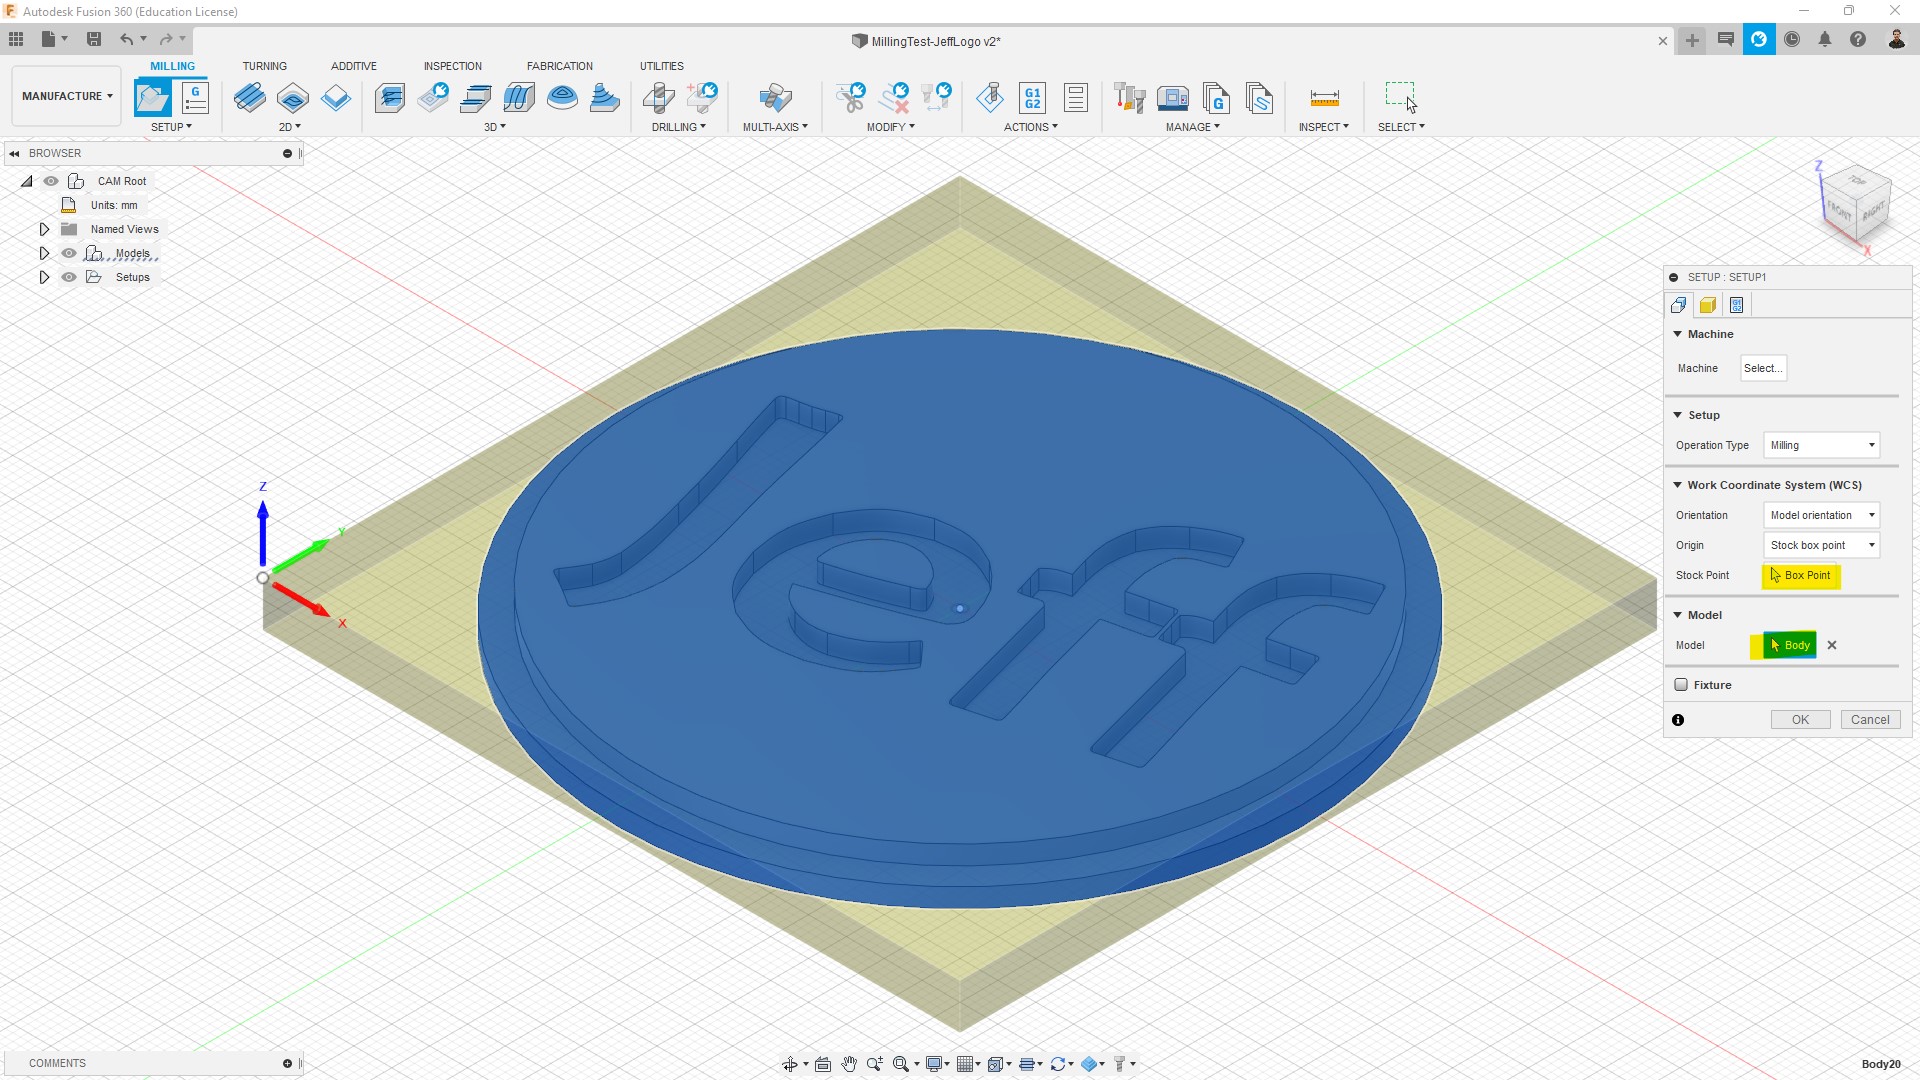
The next step would be to set the zero point of the machine in accordance with the design. It is important that the XYZ axes be set exactly in the way that the machine has them.

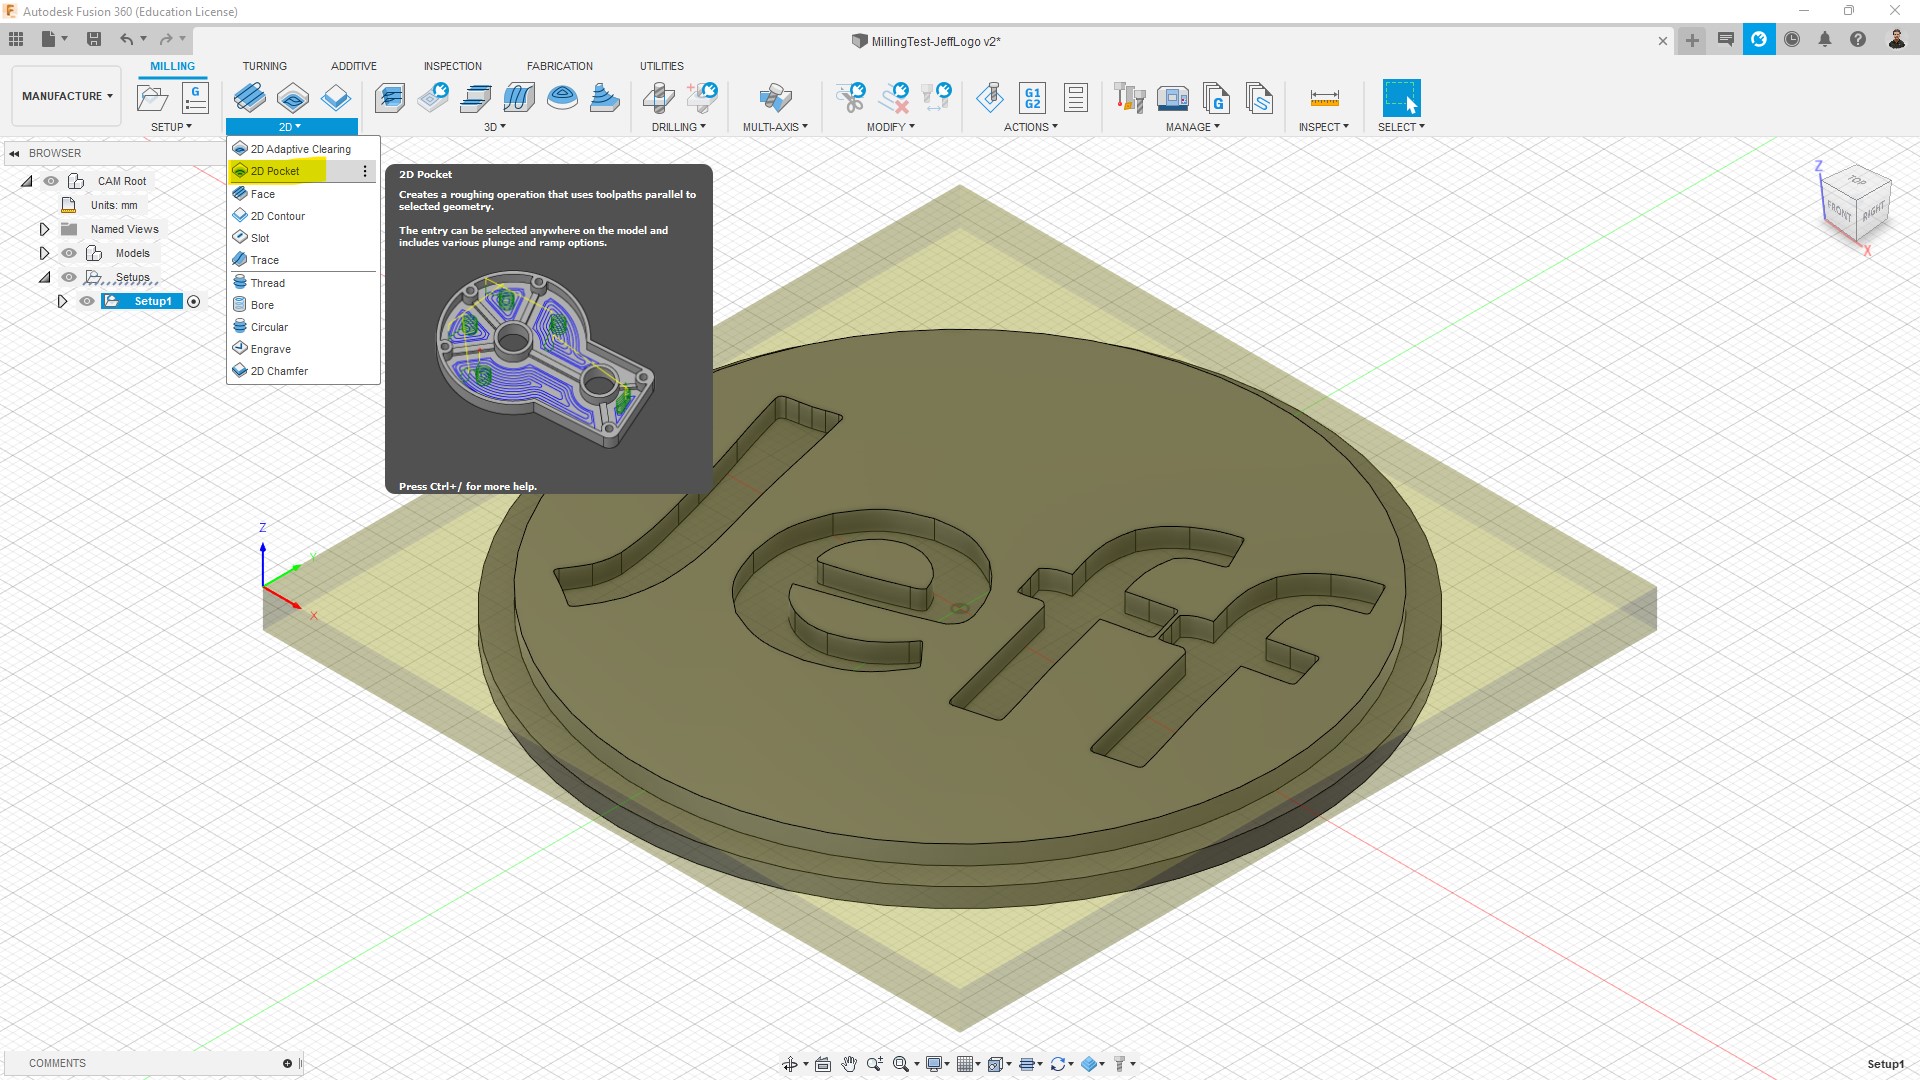
Following this, we are setting up the engraving and the cut of the design. In order to do that we make two passes on the design.
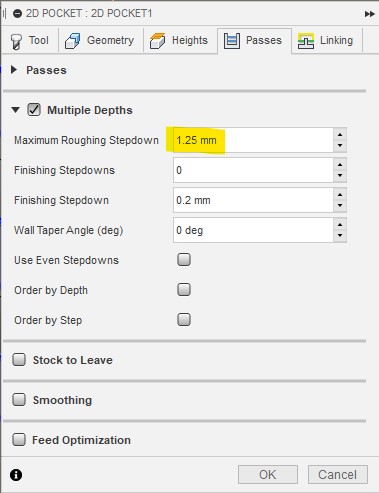
On the first pass, after choosing 2D Pocket, we insert the tool in which we are using, the feed, and speed. Also, we have to select the engraving parts of the design and specify the stepdown depth into the material. In order to specify the depth of the stepdown, the thickness of the material to which you are going to use has to be known in advance. The design has to also have the thickness of the material we are going to use and extruded to that thickness accordingly. The parameters used for the roughing/engraving are as follows:

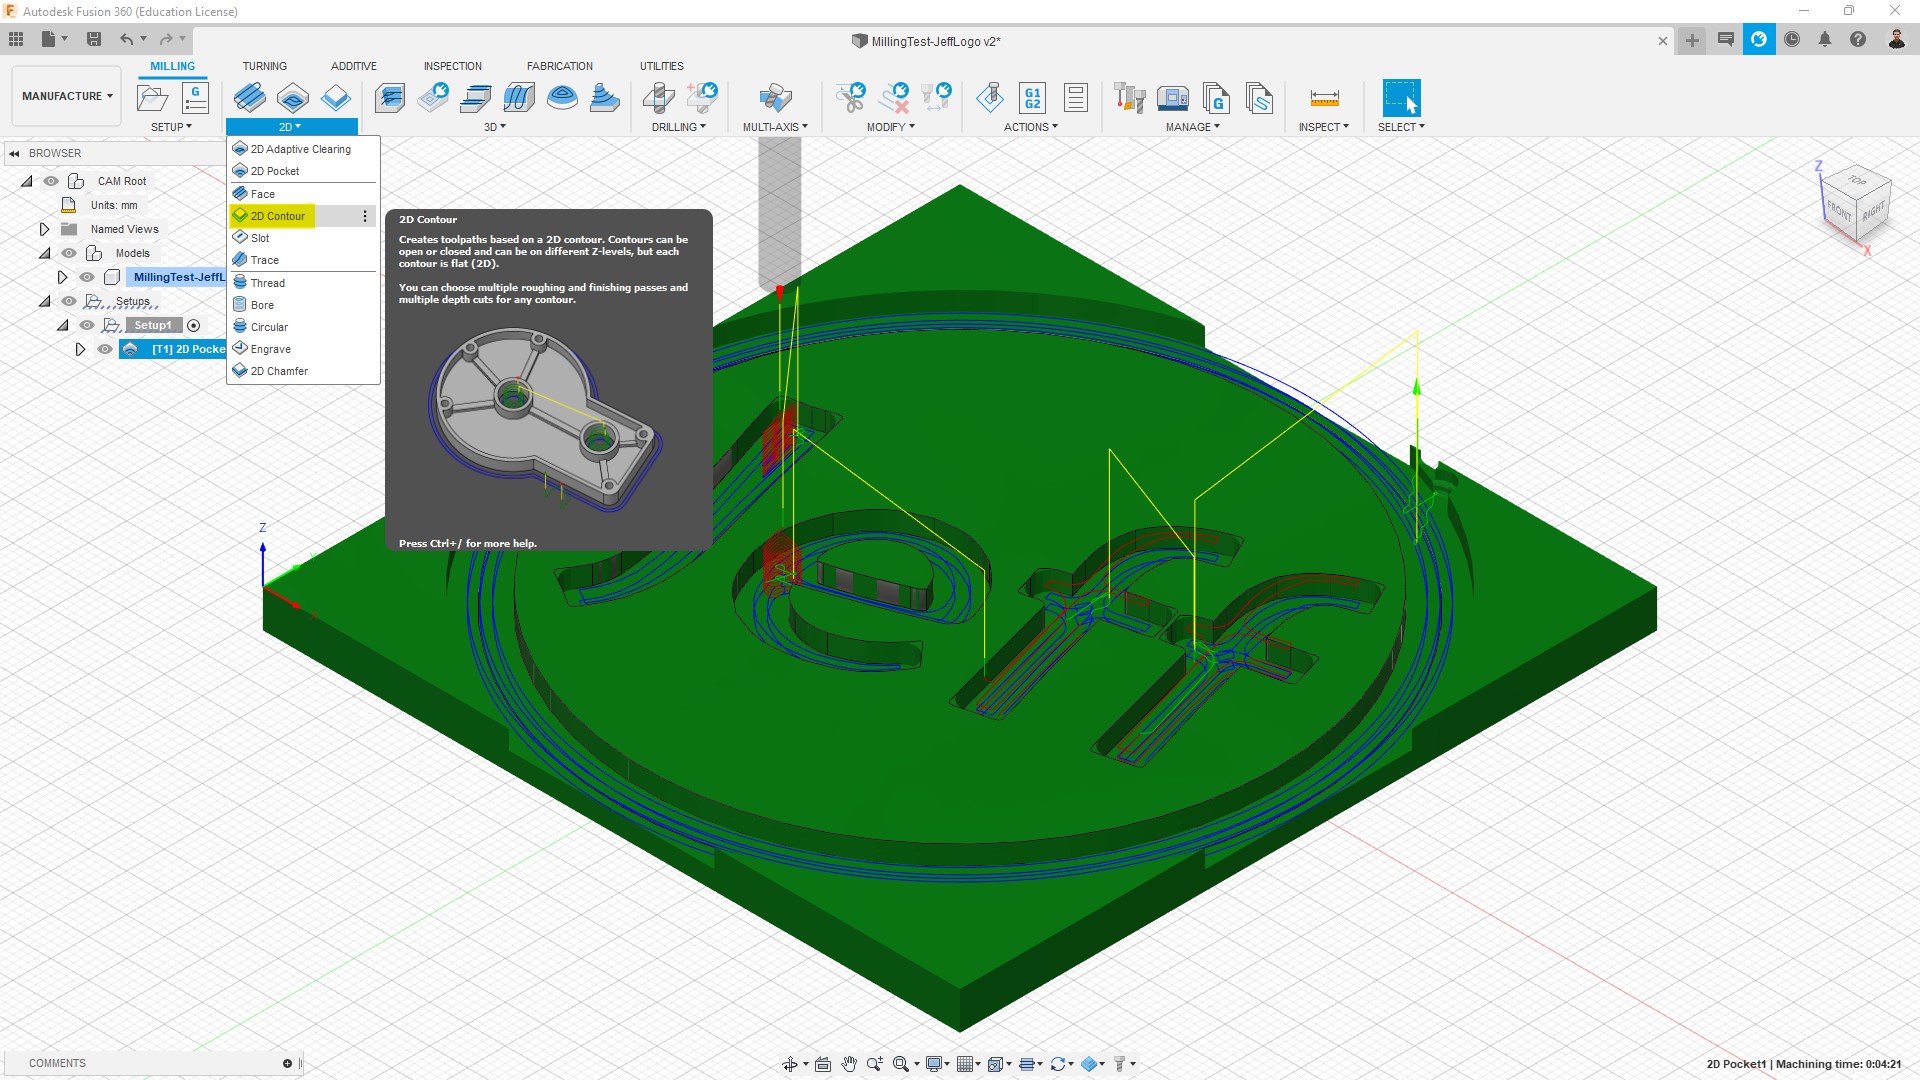
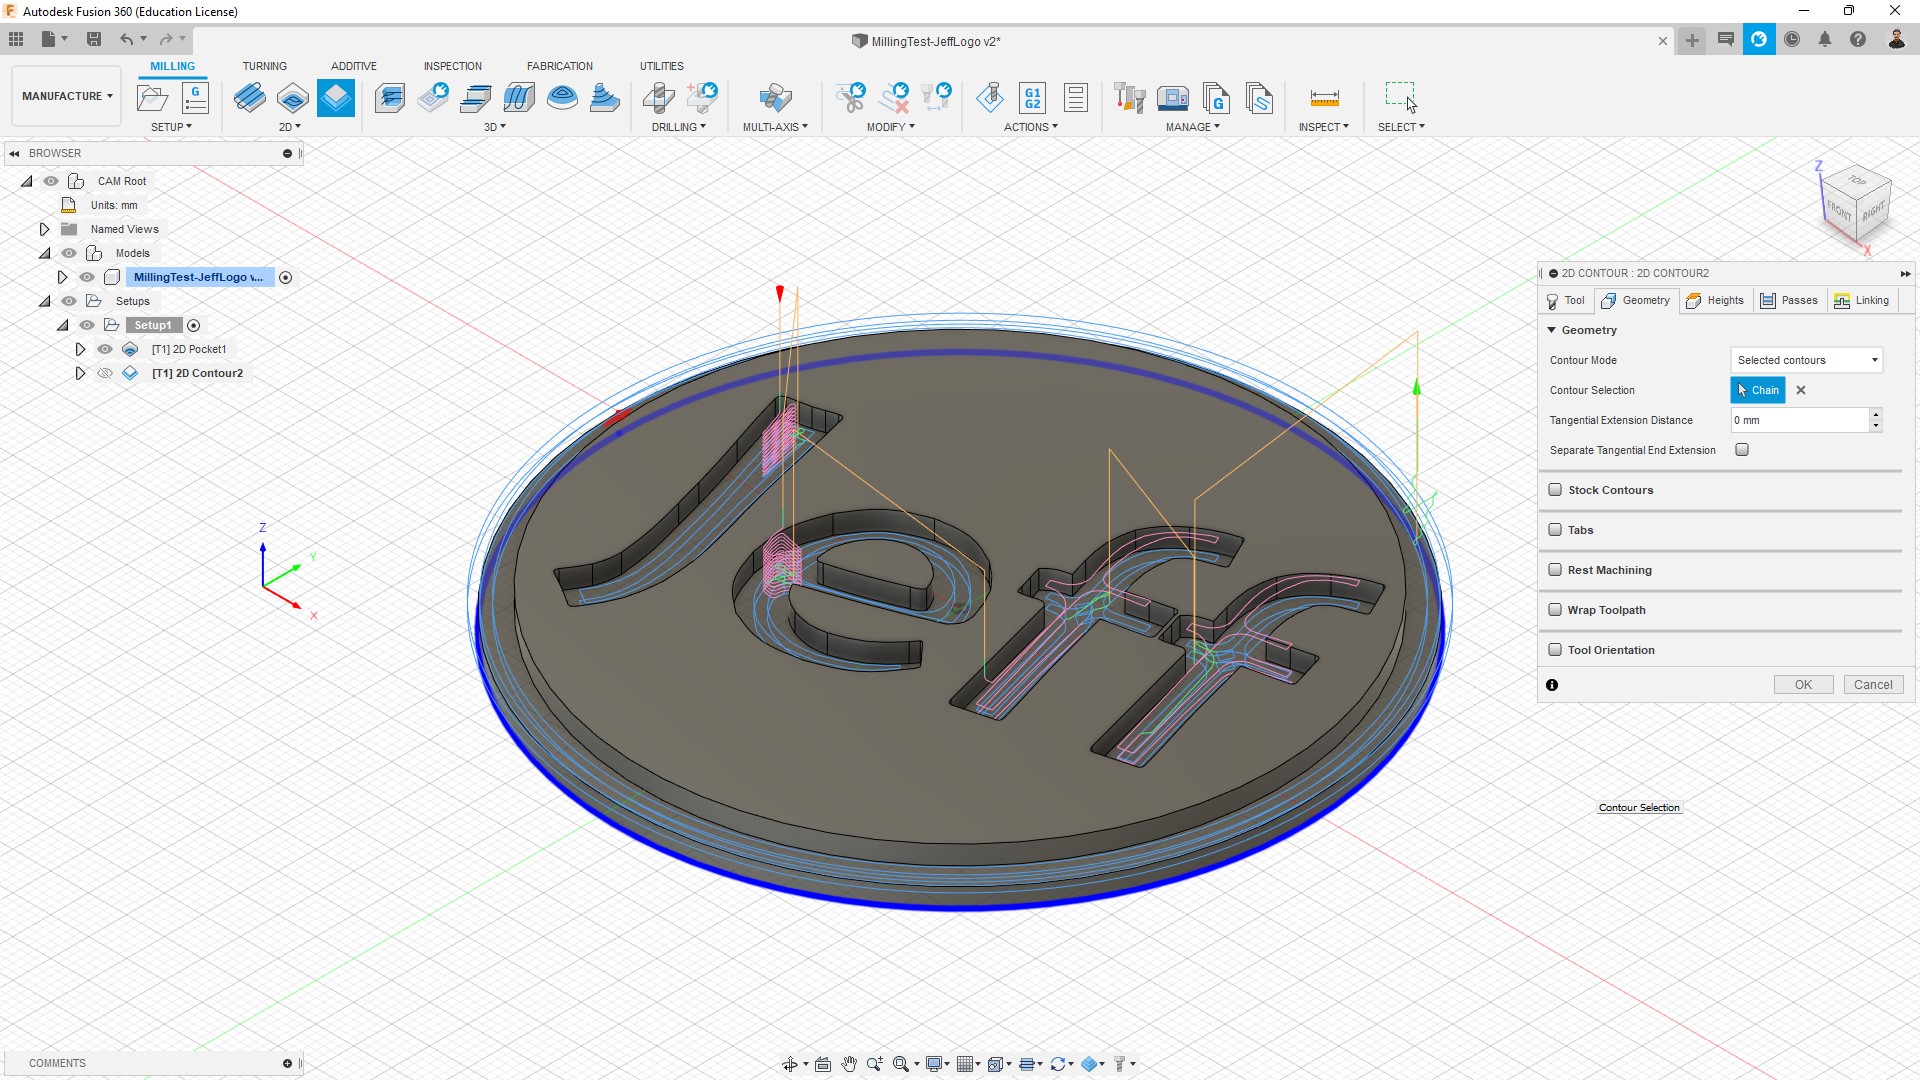
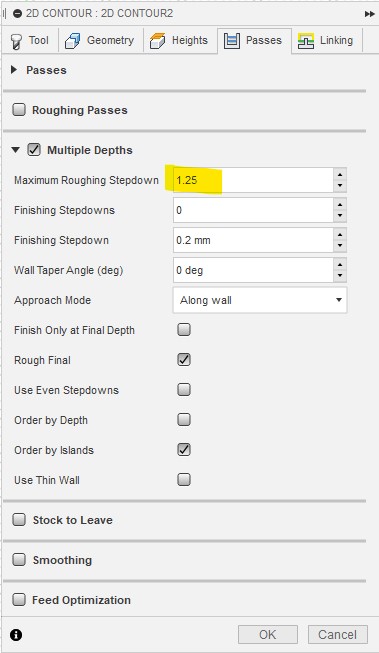
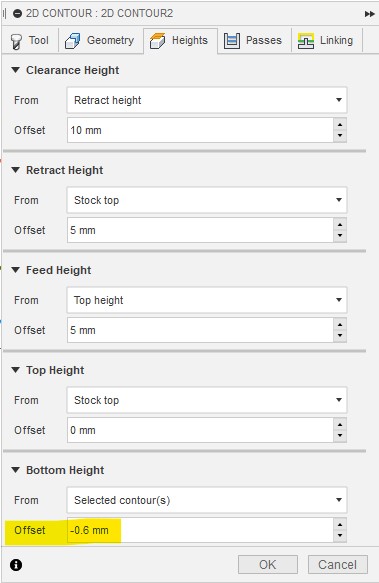
Like the roughing pass, we set also the parameters for the finishing pass using 2D Contour as follows:
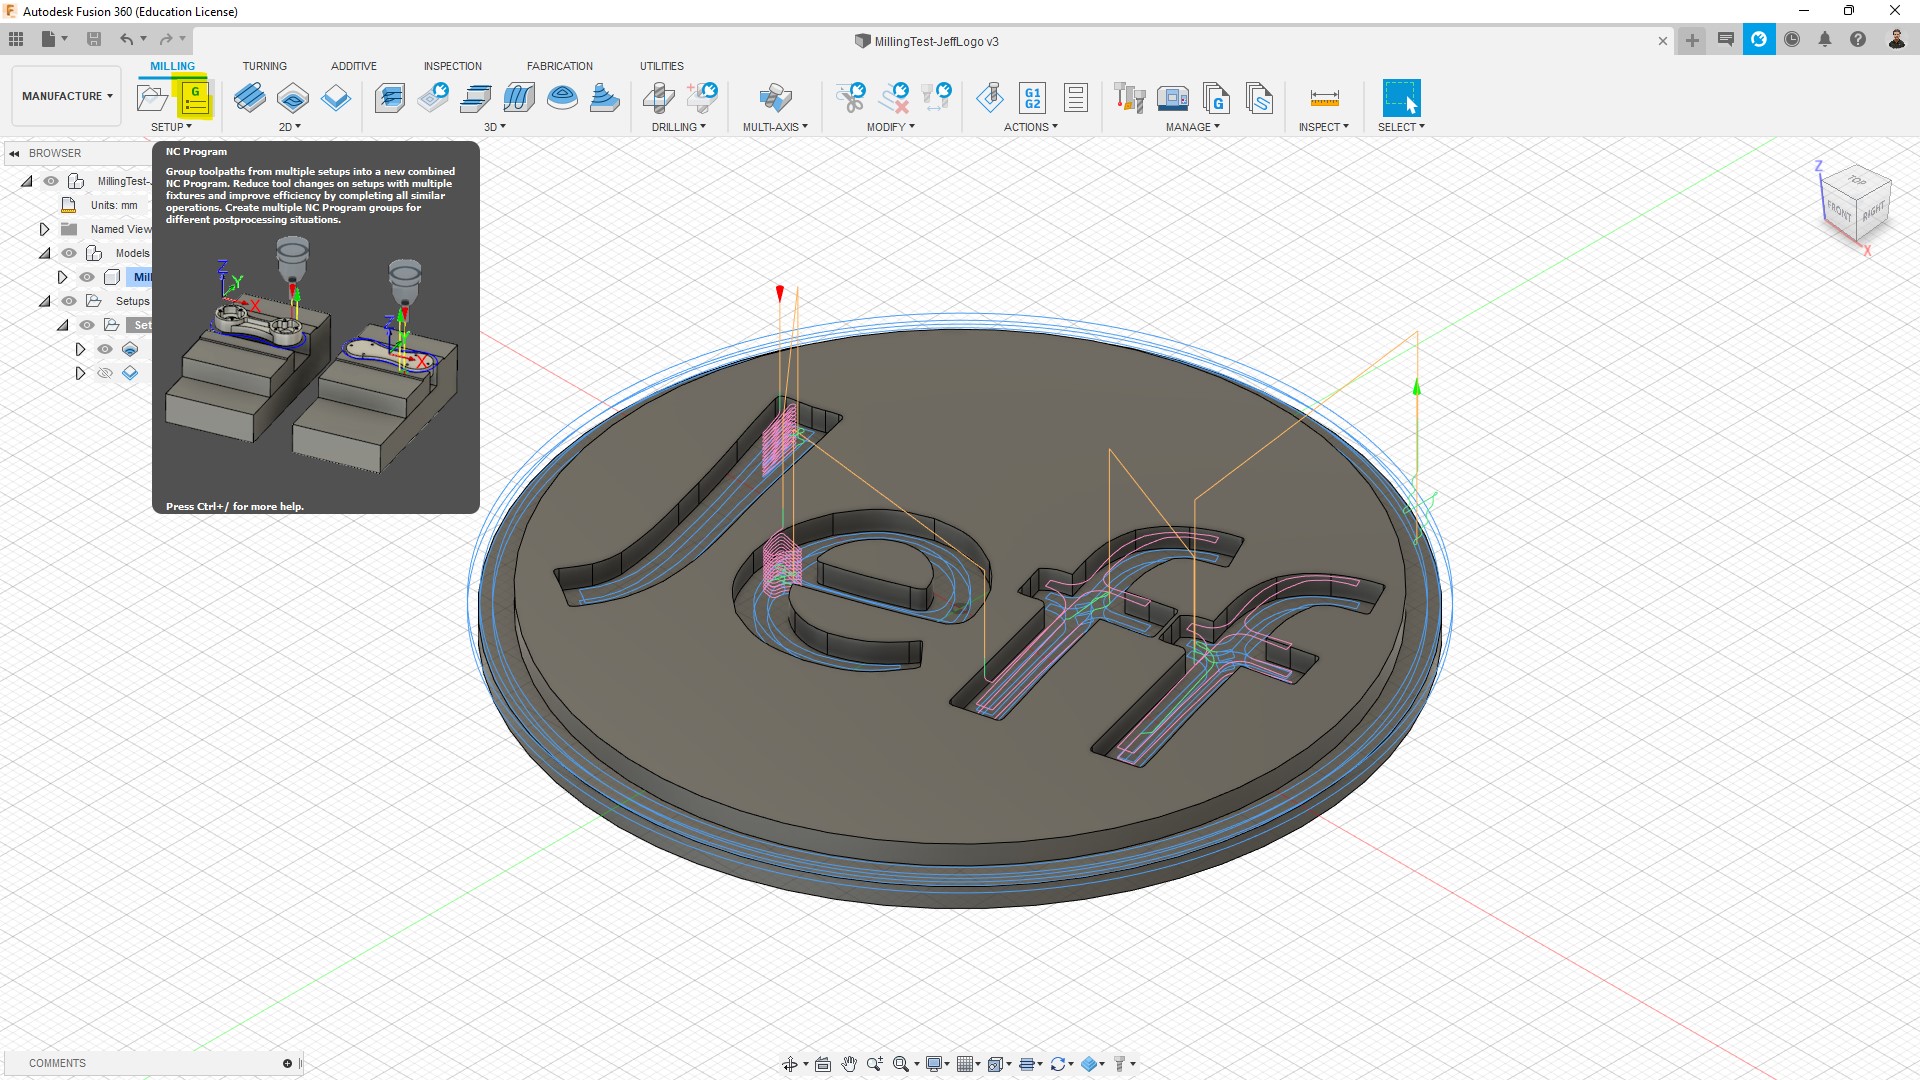
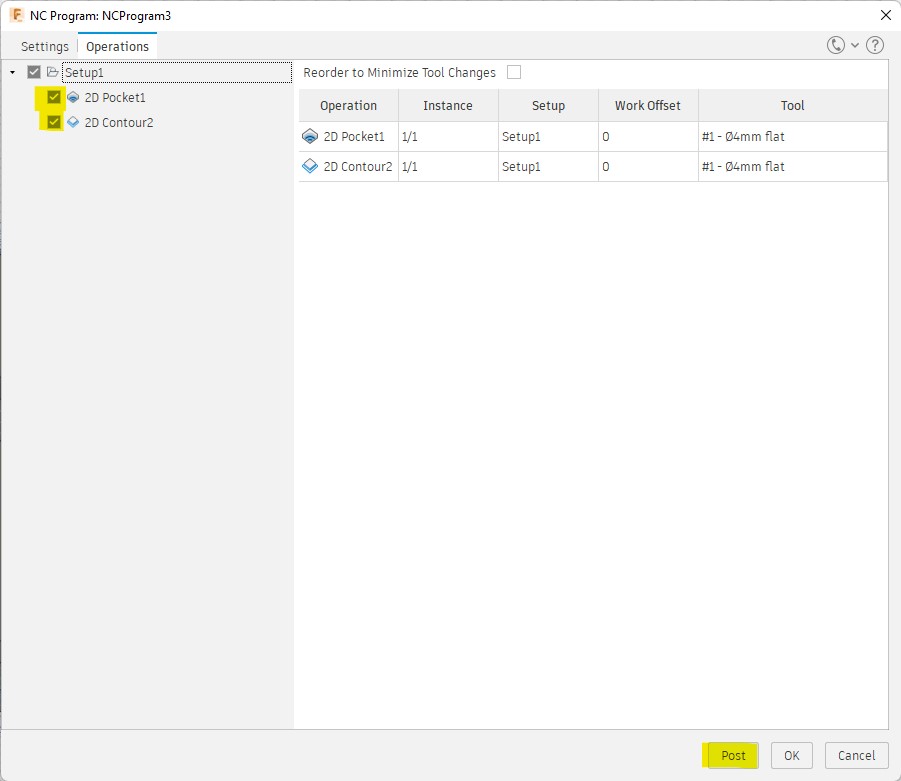
The last step is to generate the gcode for the CNC machine. It is important to choose the right Post Processor and select both processes set above. After these are checked, then we press post and we proceed with the cutting in the CNC machine.

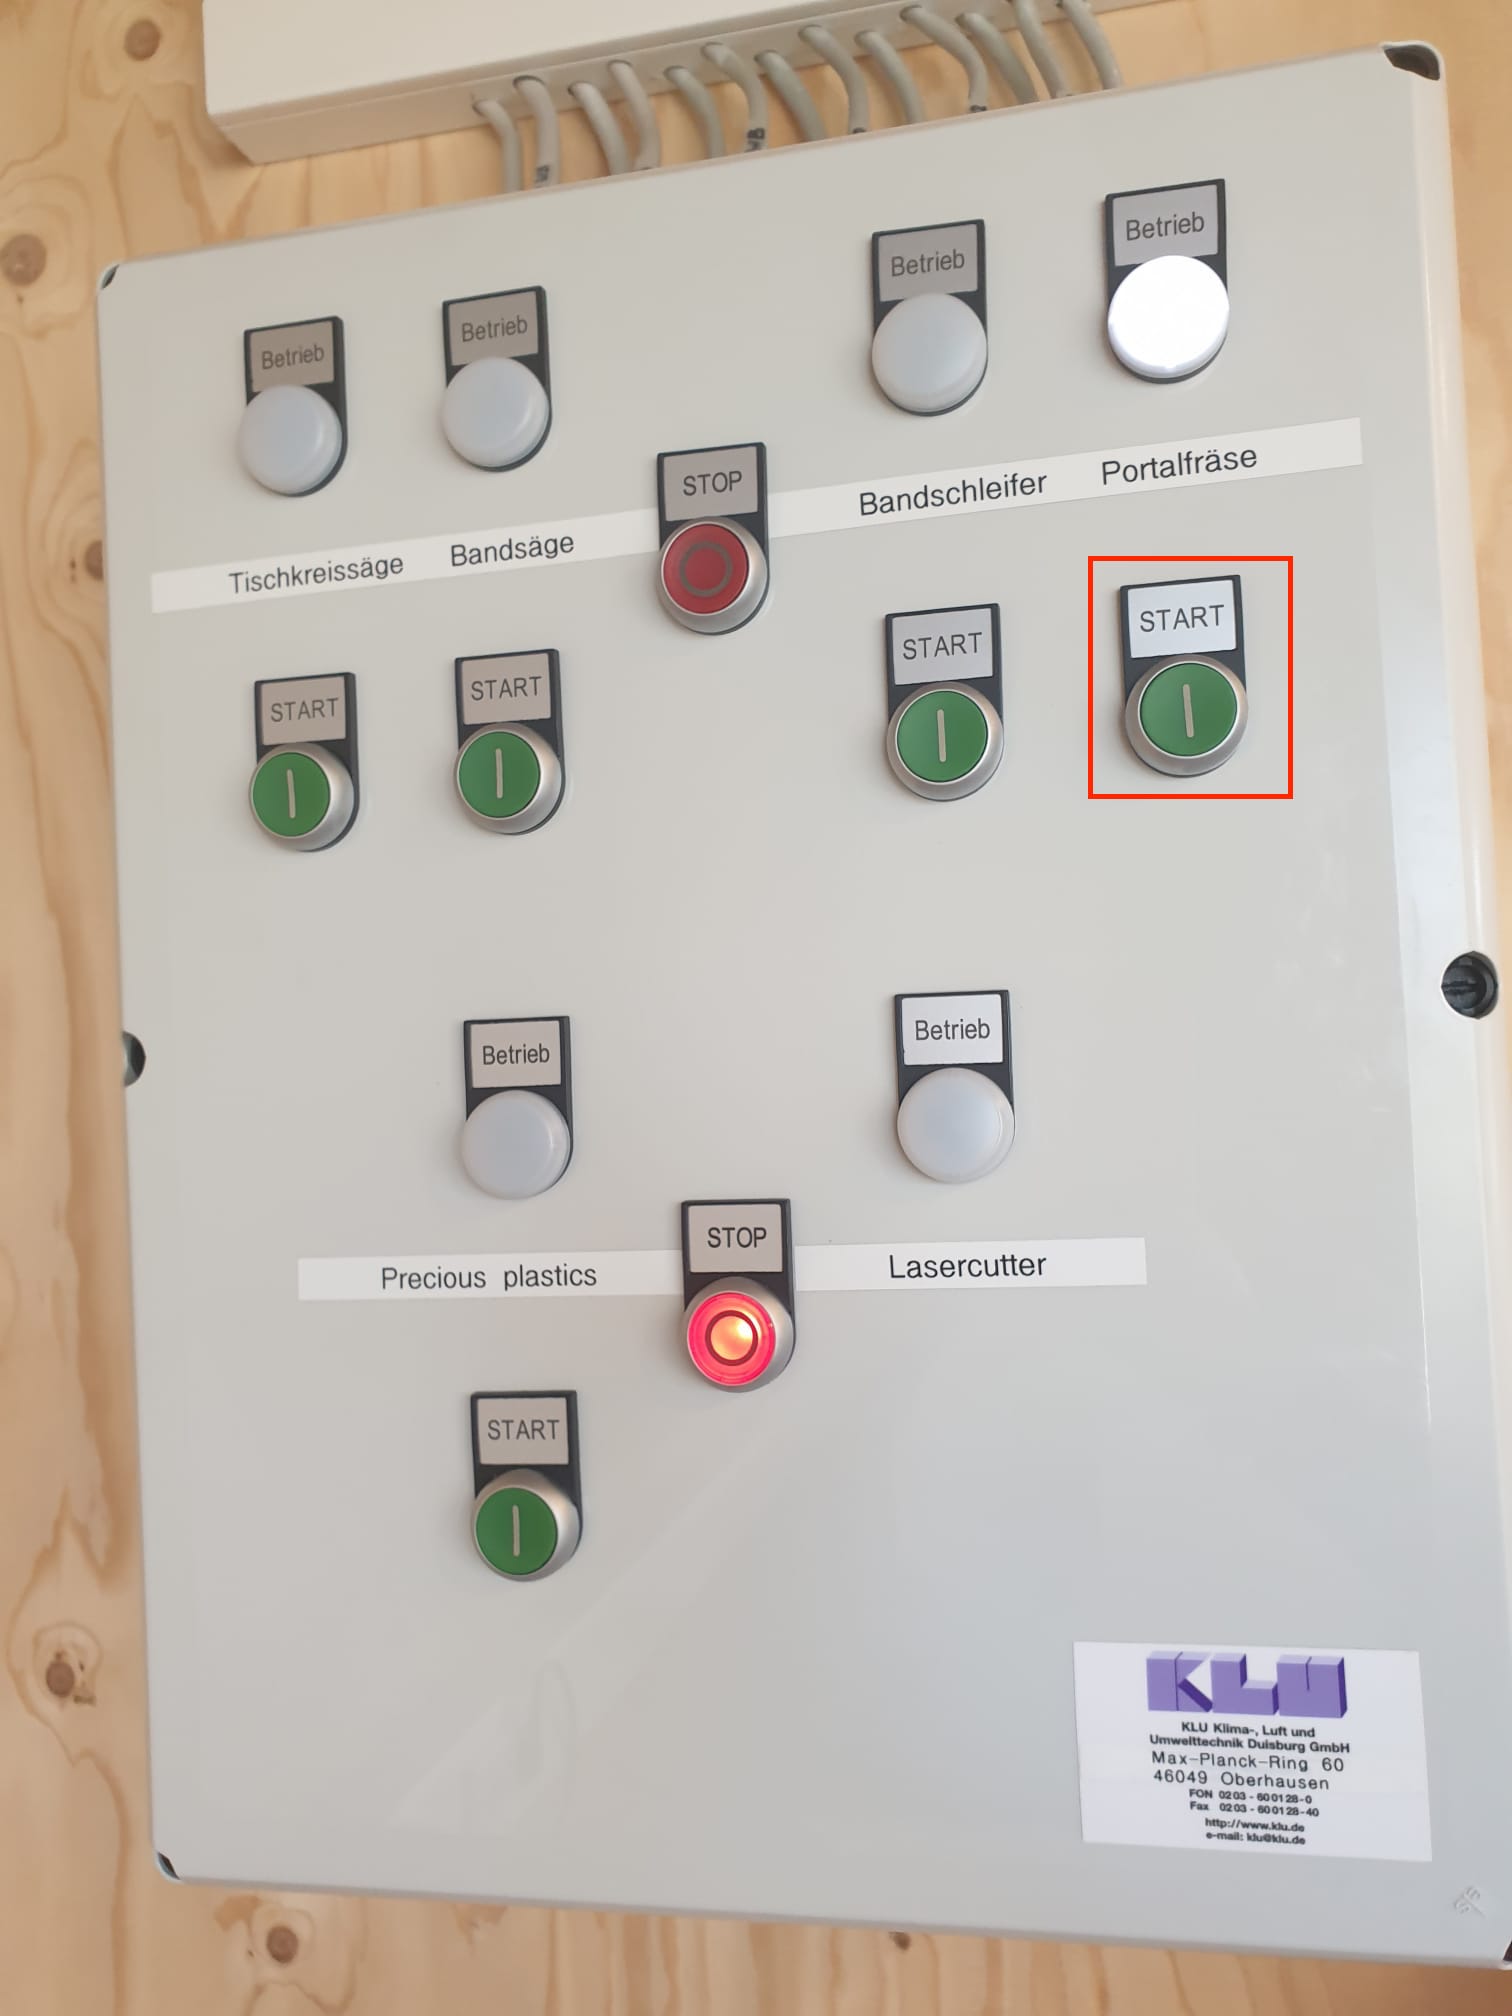
The first thing to do when using the CNC machine is to initiate it at the control panel. In order to do that, we press the button for the Portalfräse.
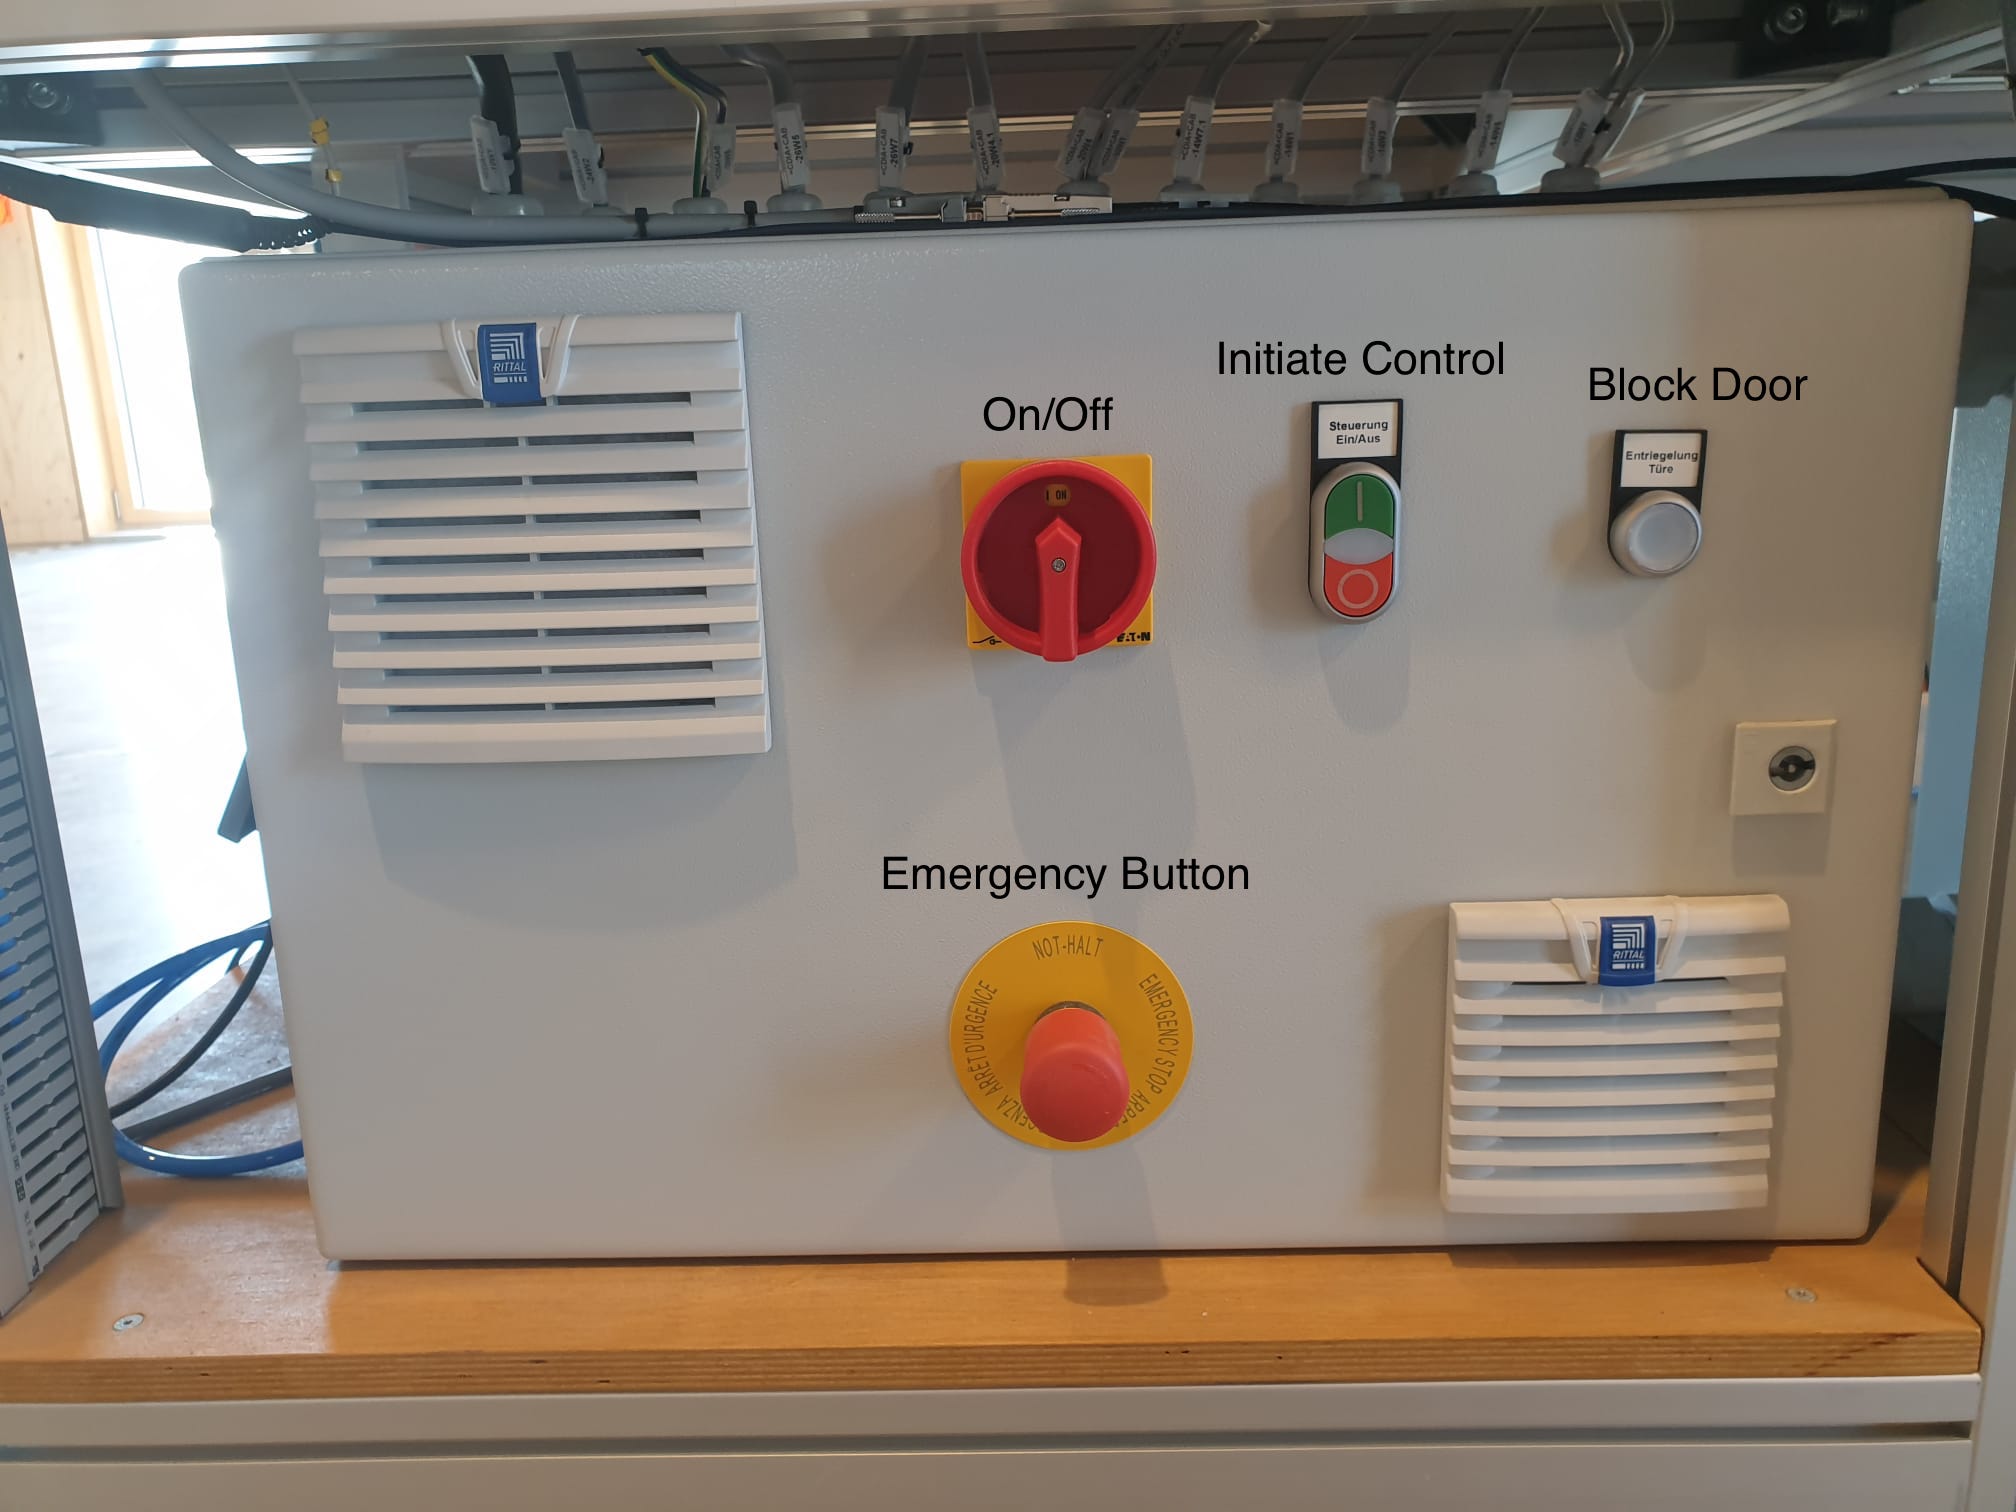
Next, we connect the Gast1 laptop to the machine, turn on the CNC machine and initiate Control. If the doors of the CNC machine are blocked, we for now release them by using the button in the CNC control panel too.
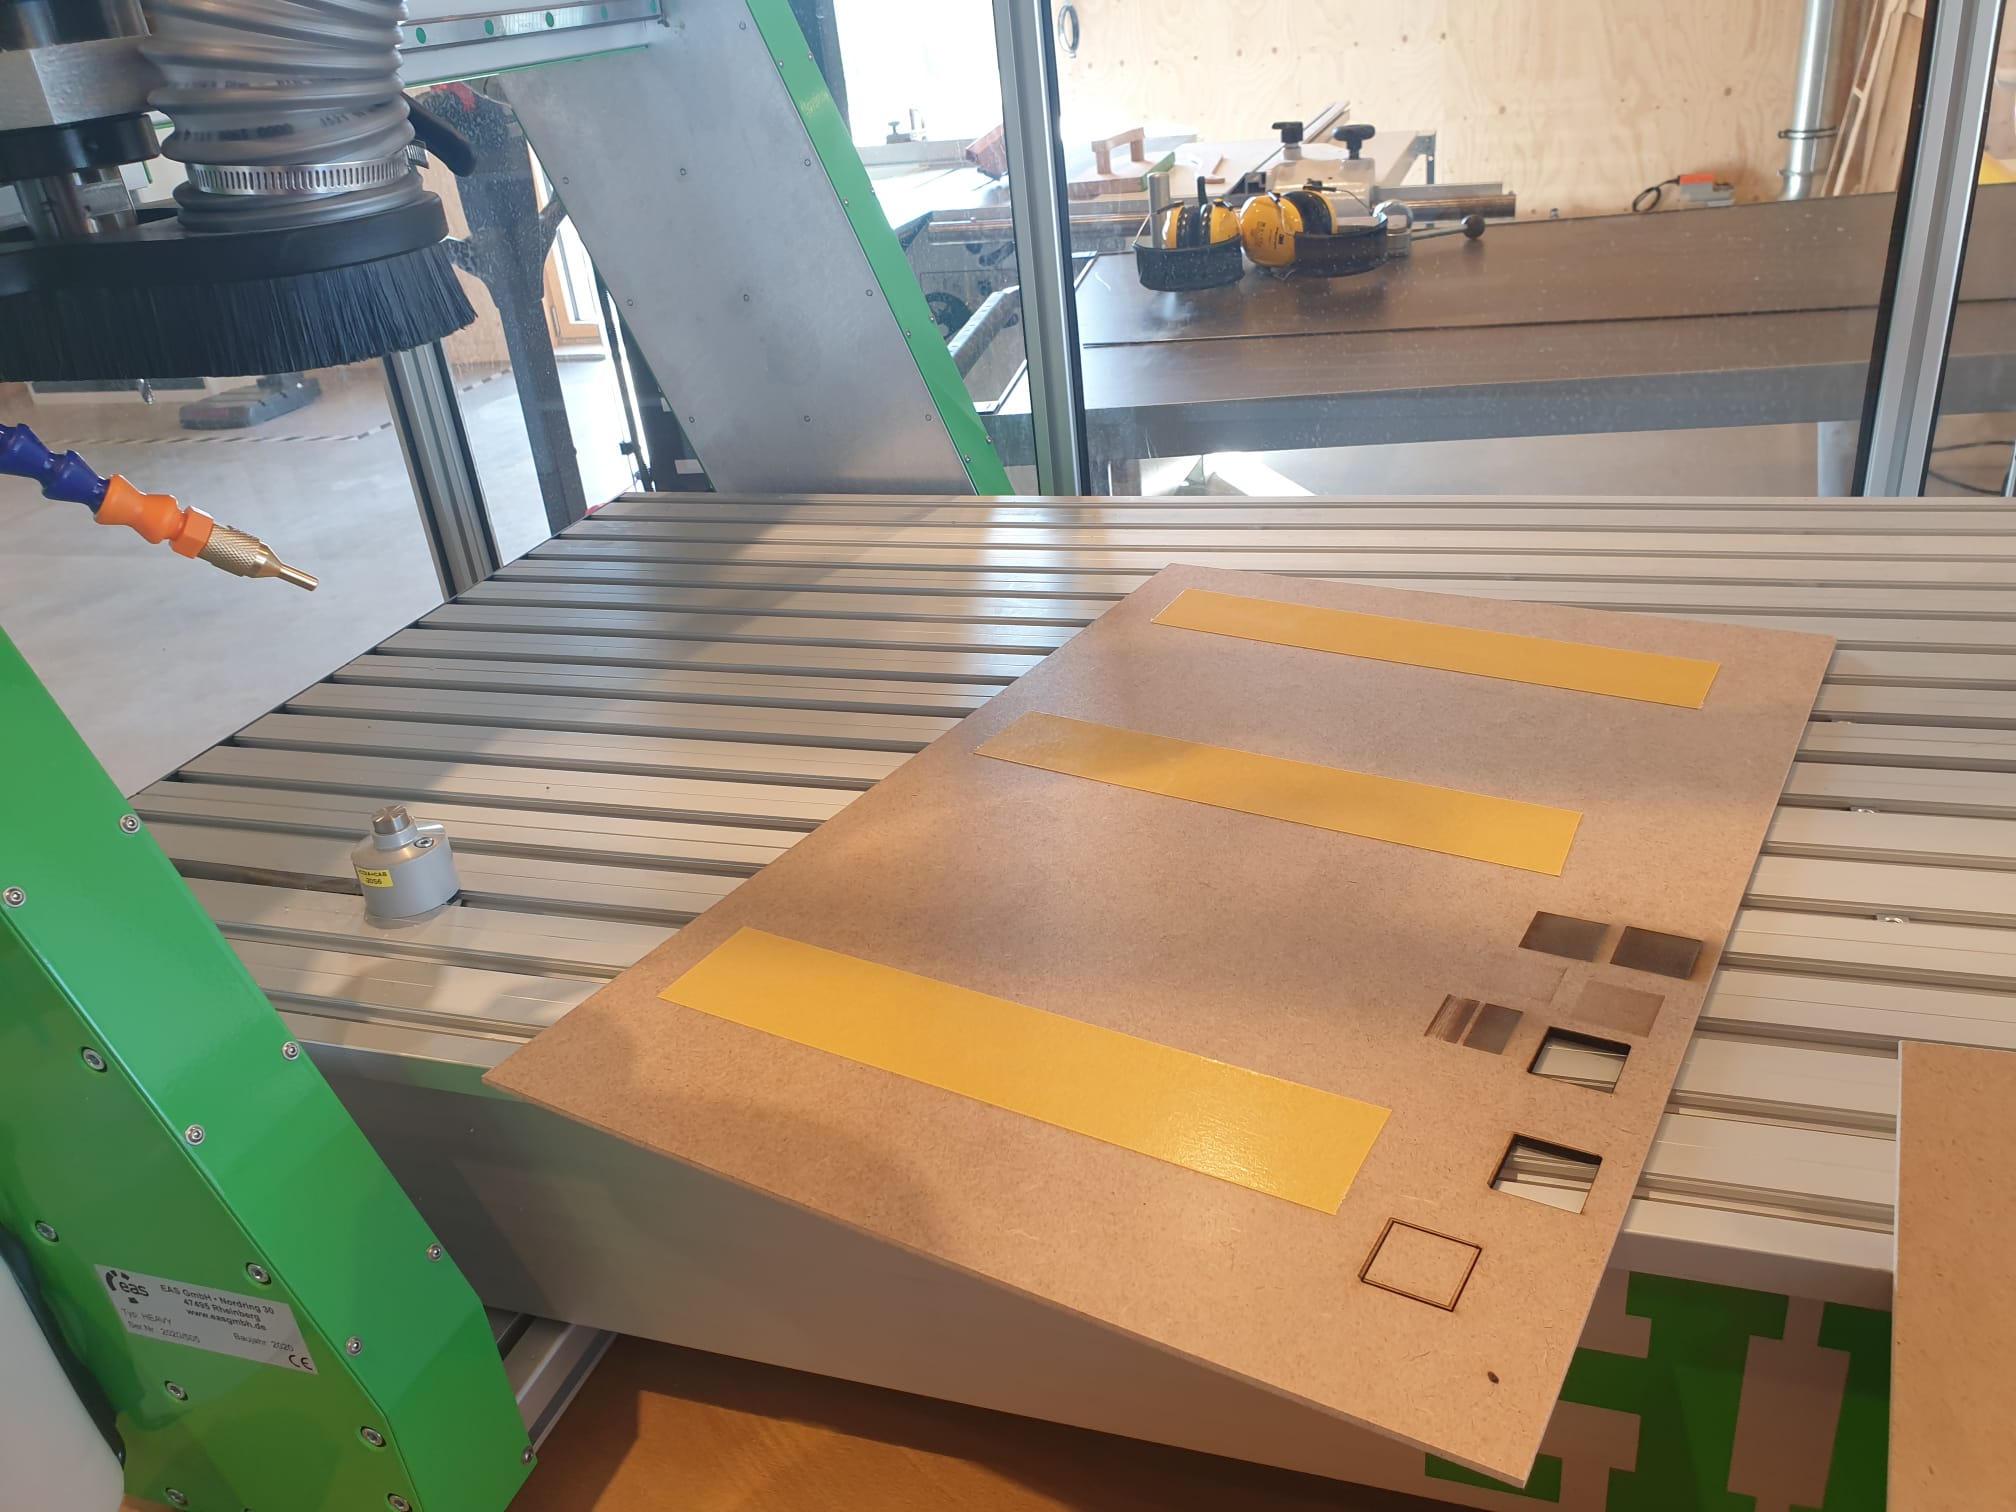
After releasing the doors, we place the first layer on the CNC bed as a protective layer, and then on it place the piece to be cut. To do that, double-sided tape was used for both layers.
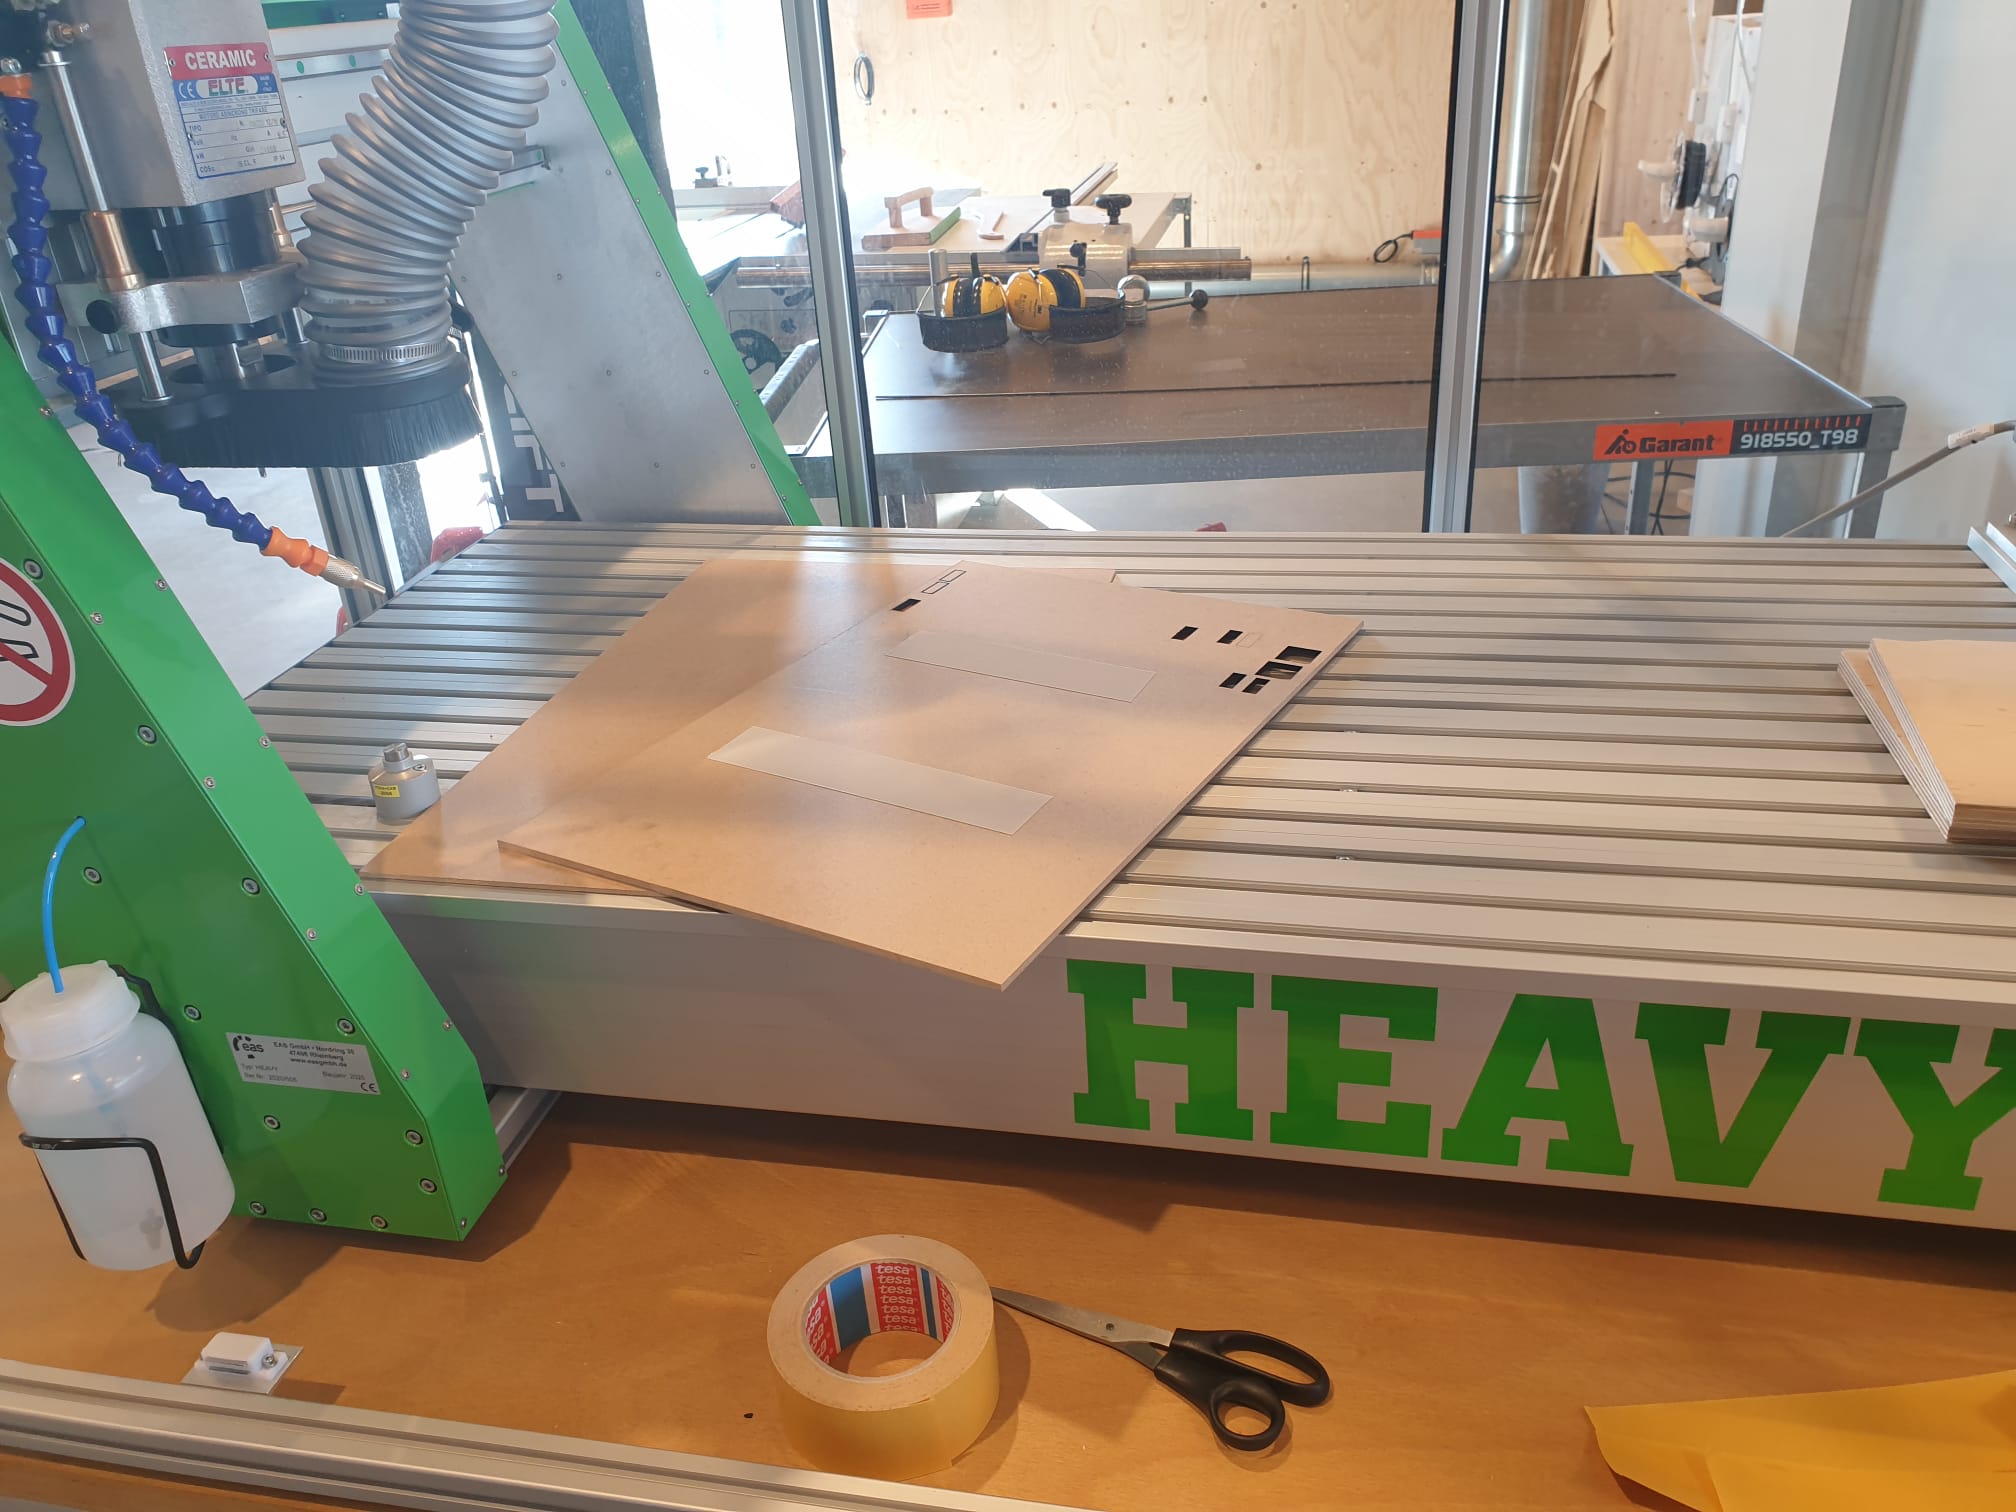
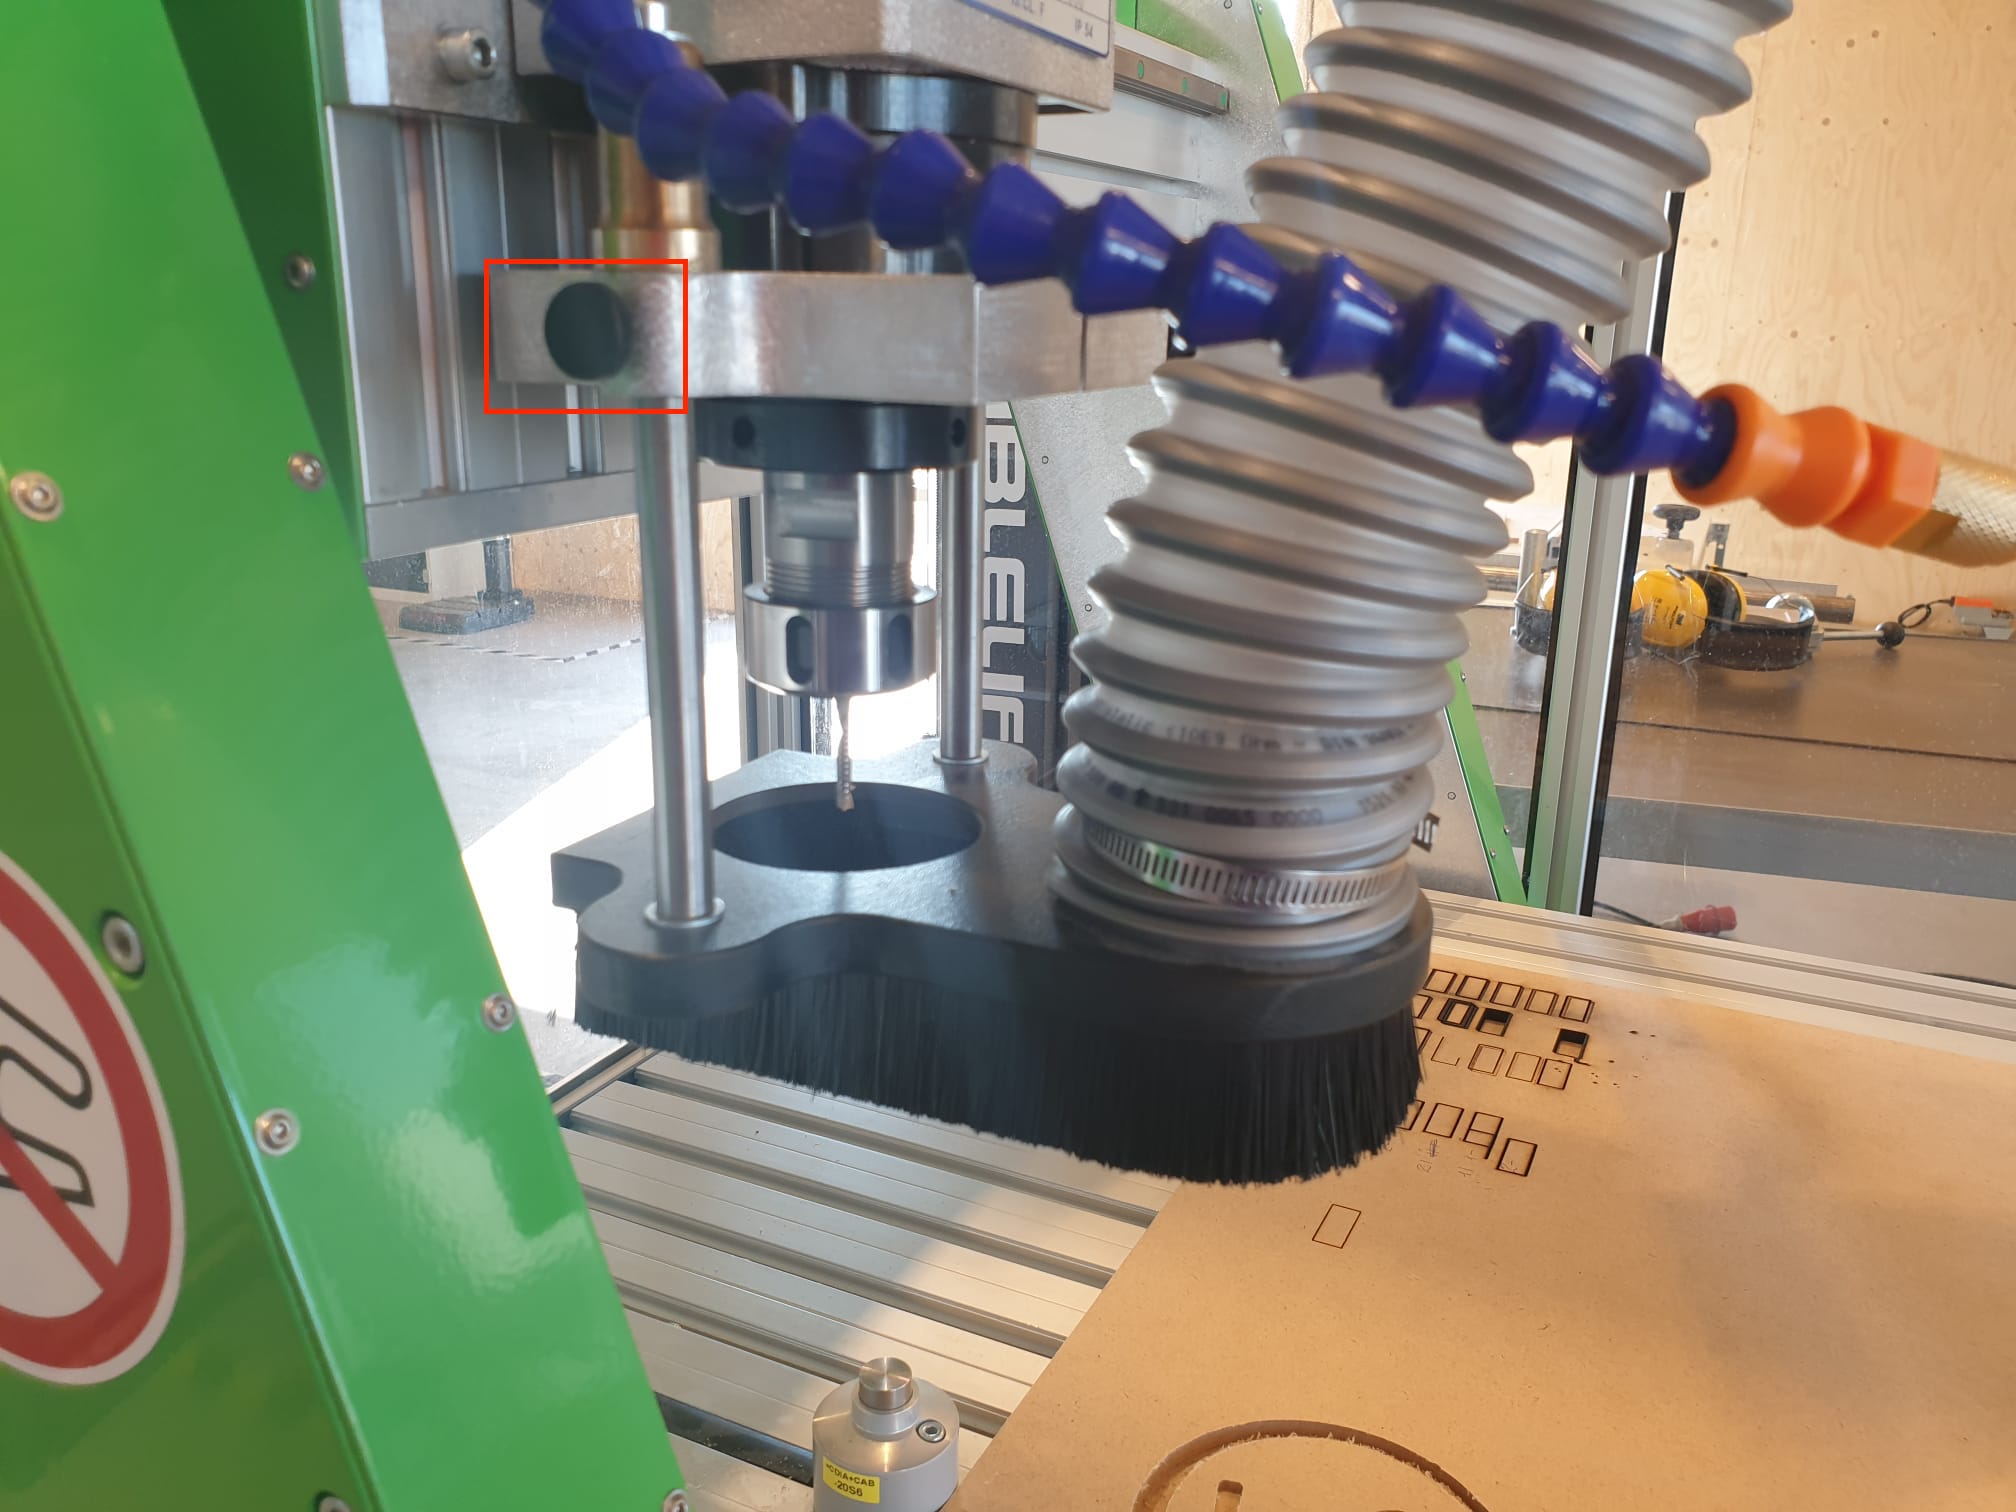
The next step would be to determine the zero point of our CNC machine, where our design will be cut. We can use either the hand controller or the control in the software to do that. We have to set the XY axes and Z axes as set in Fusion360.
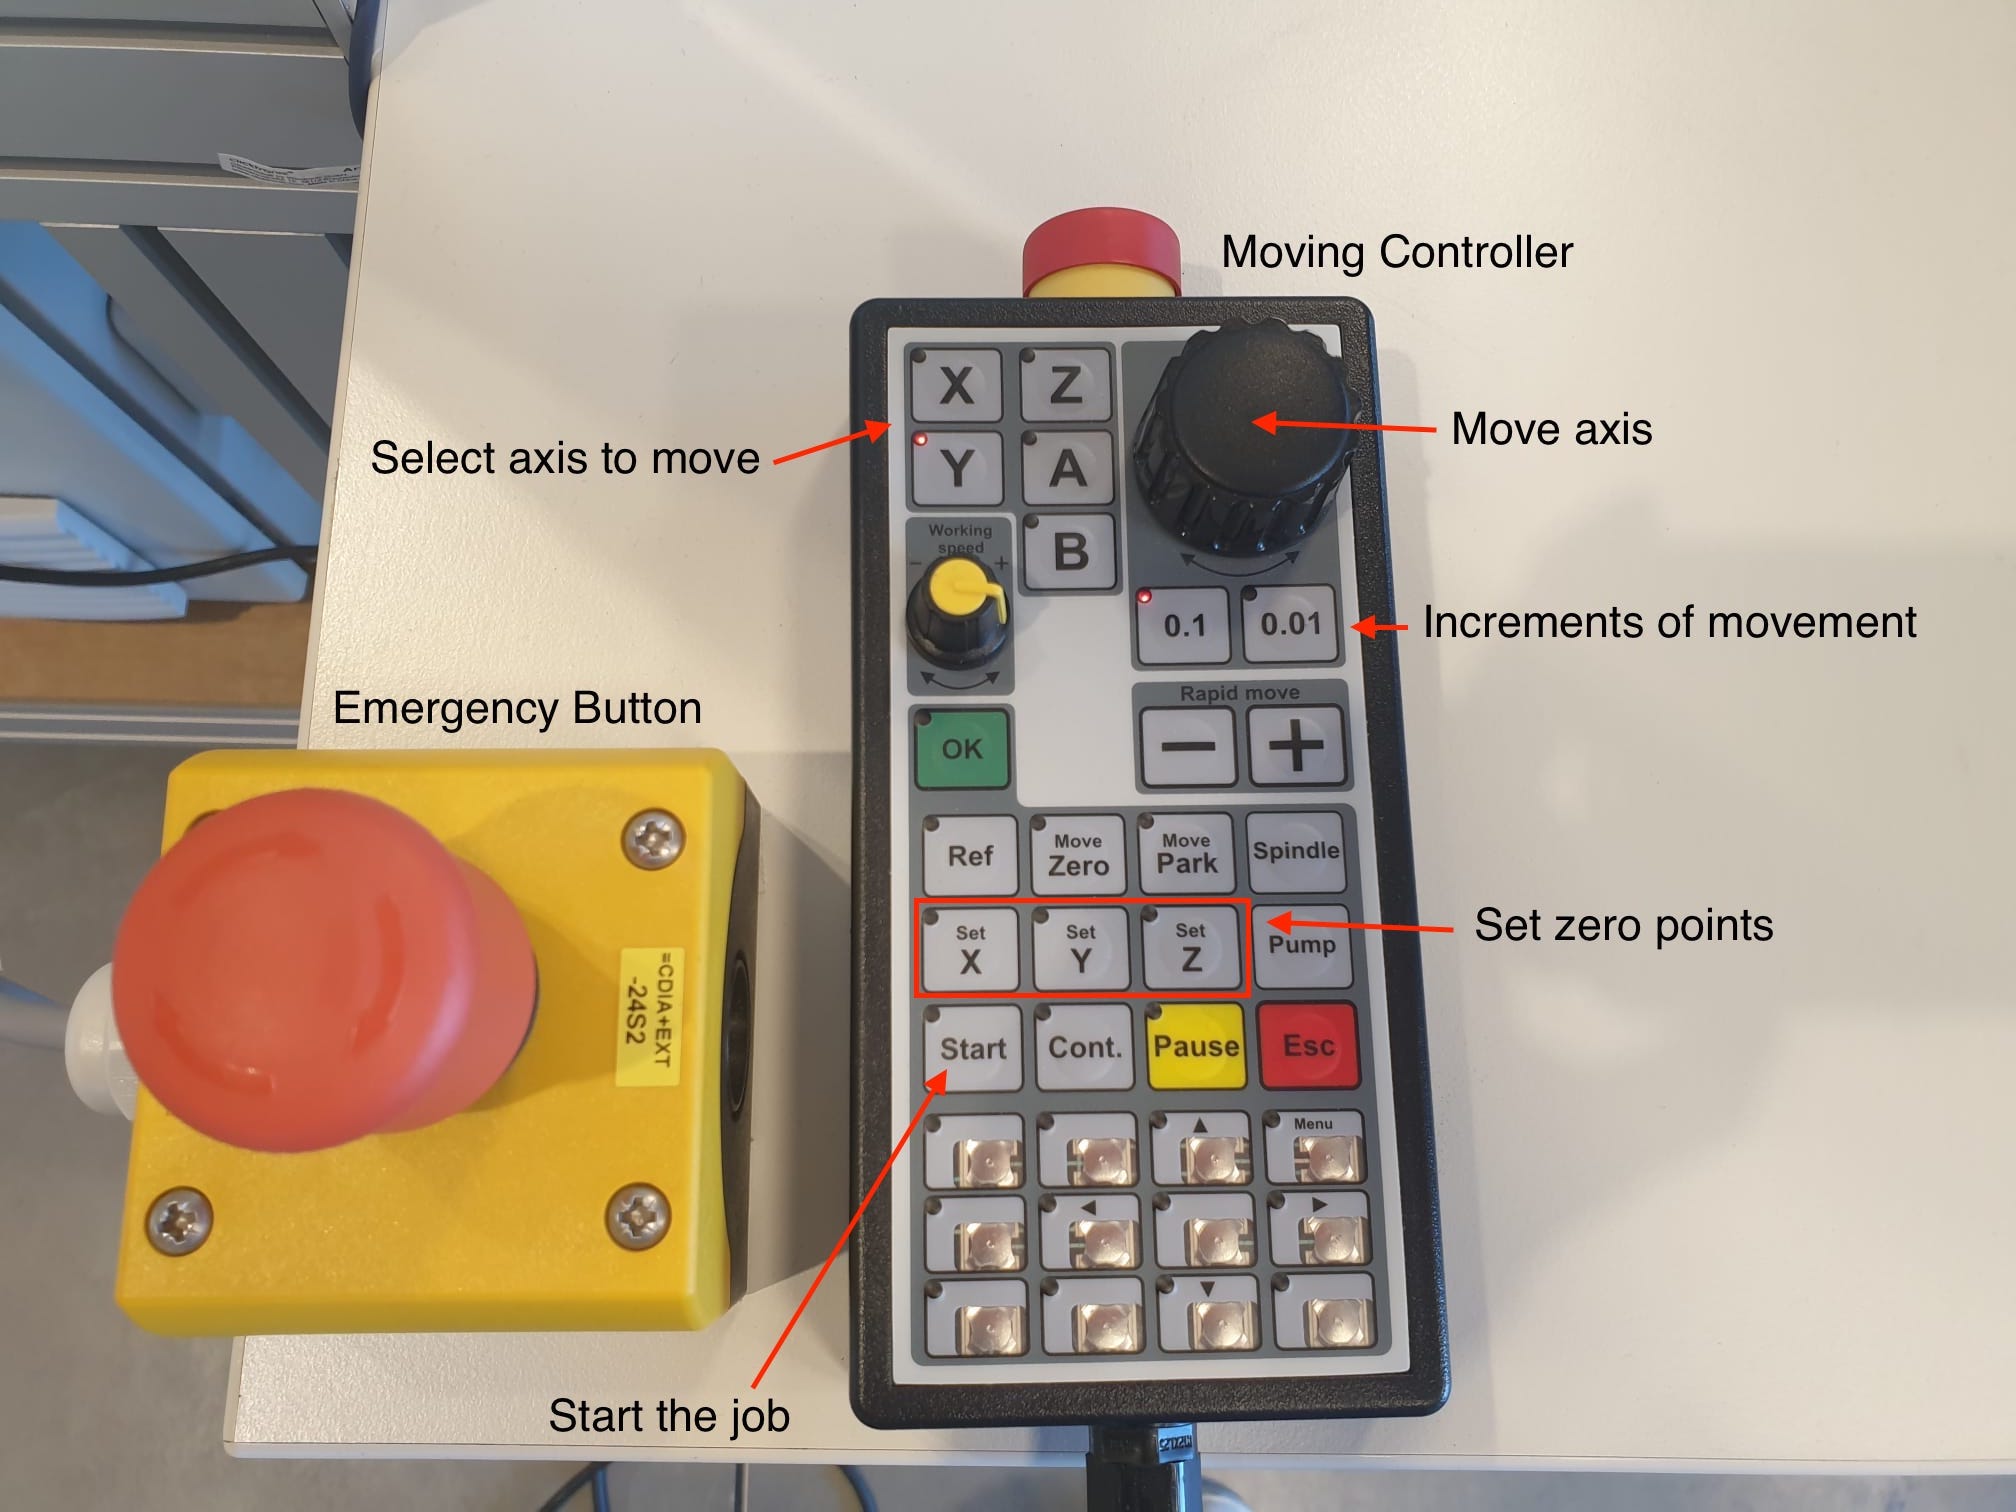
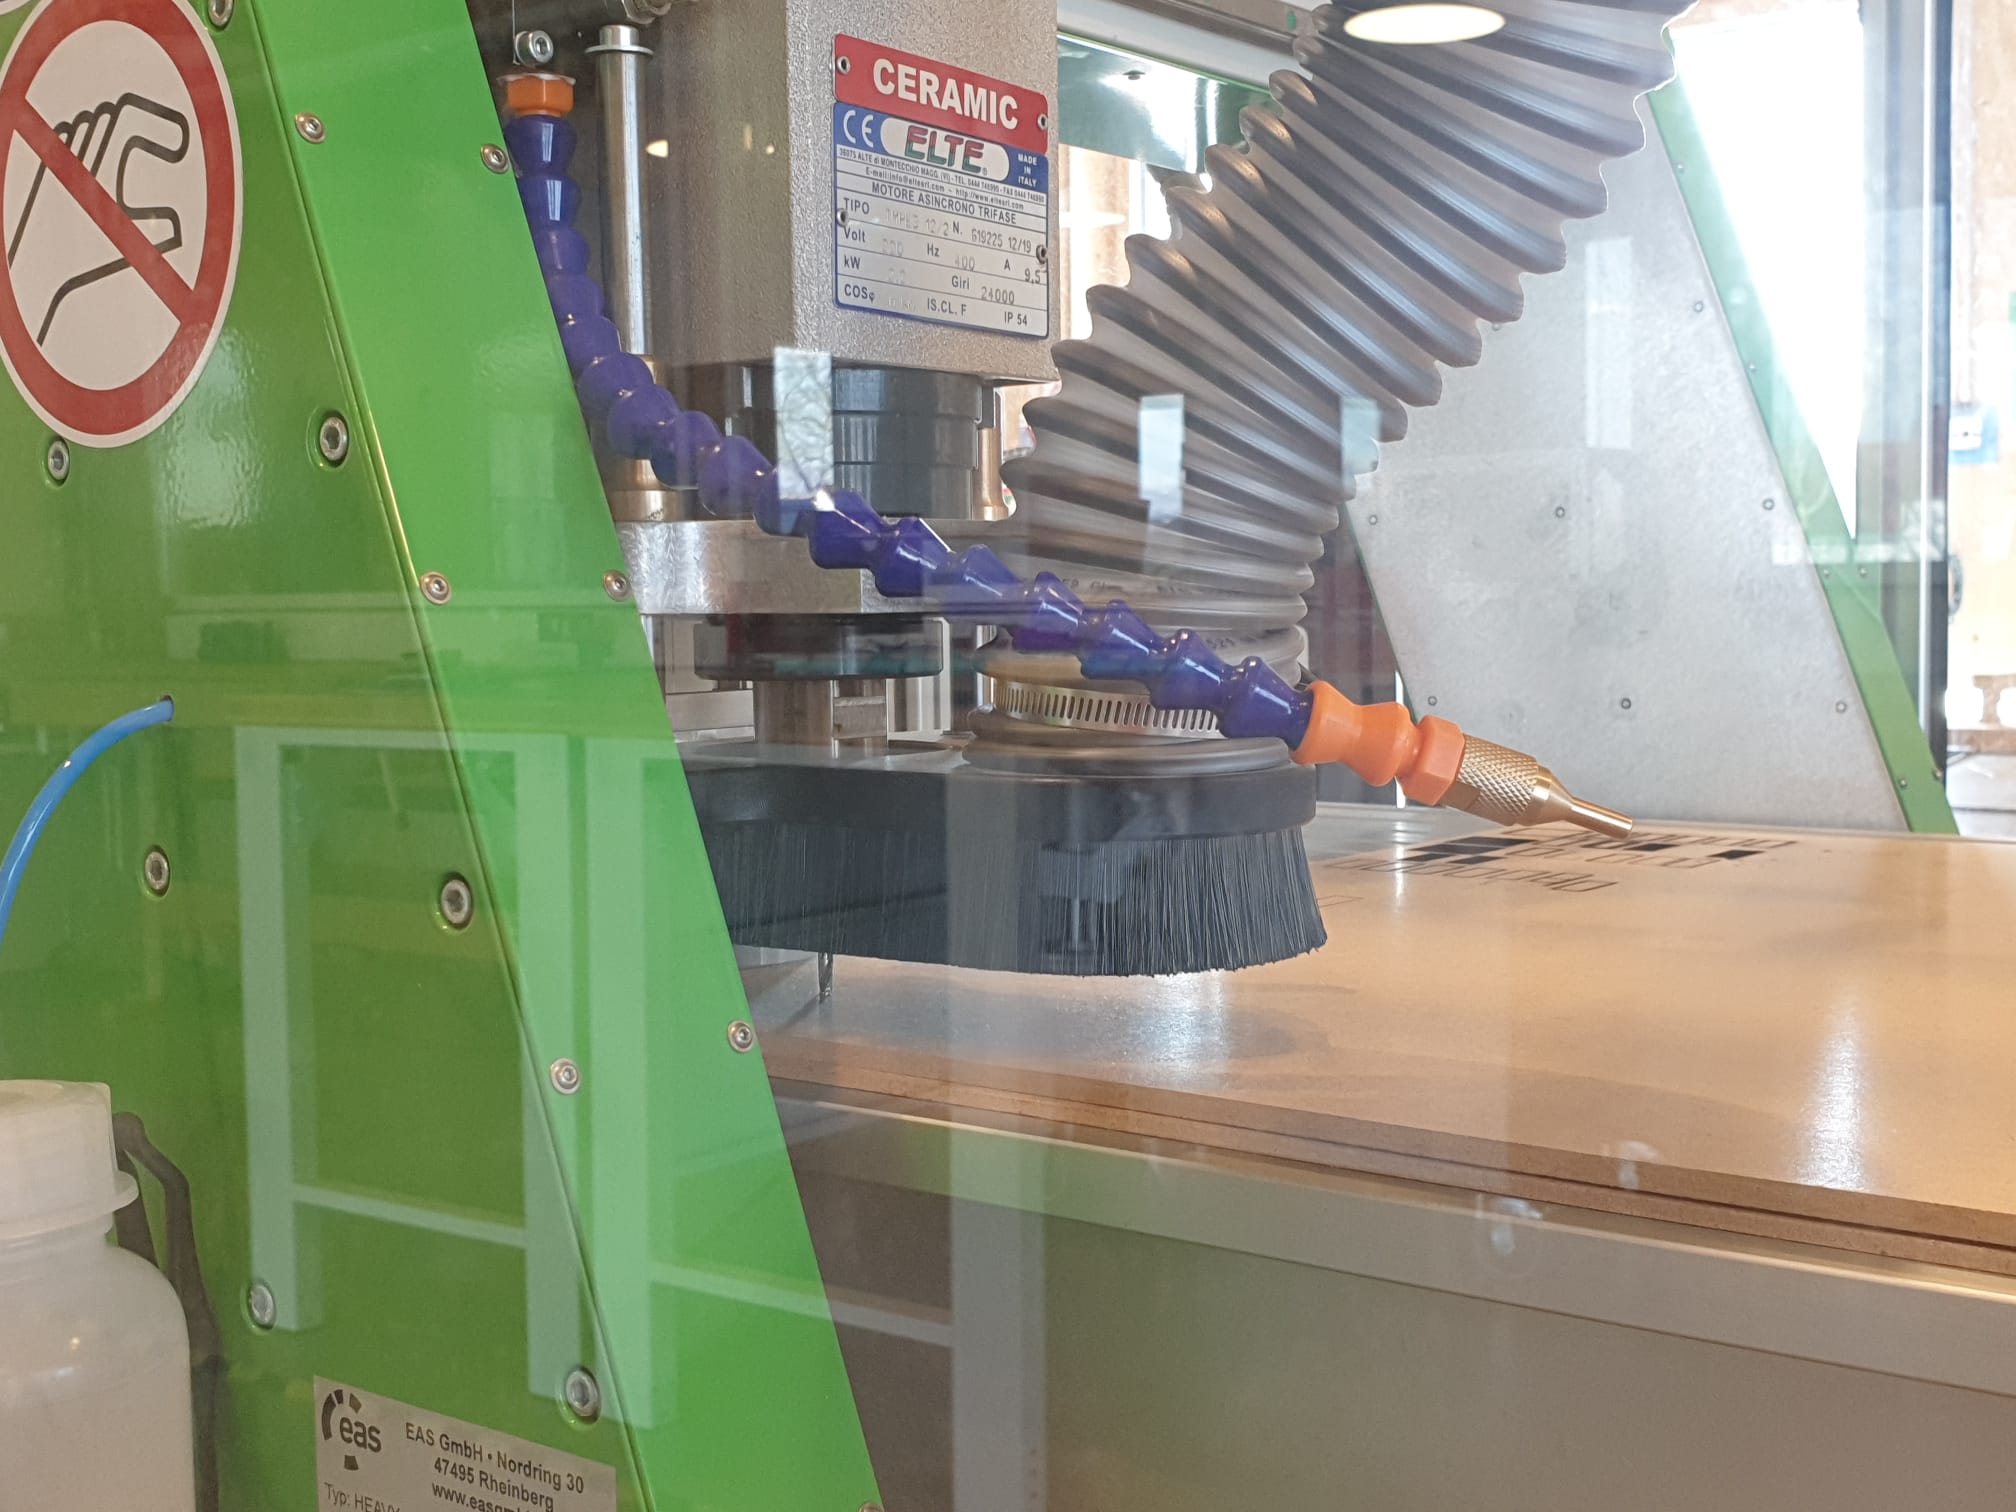
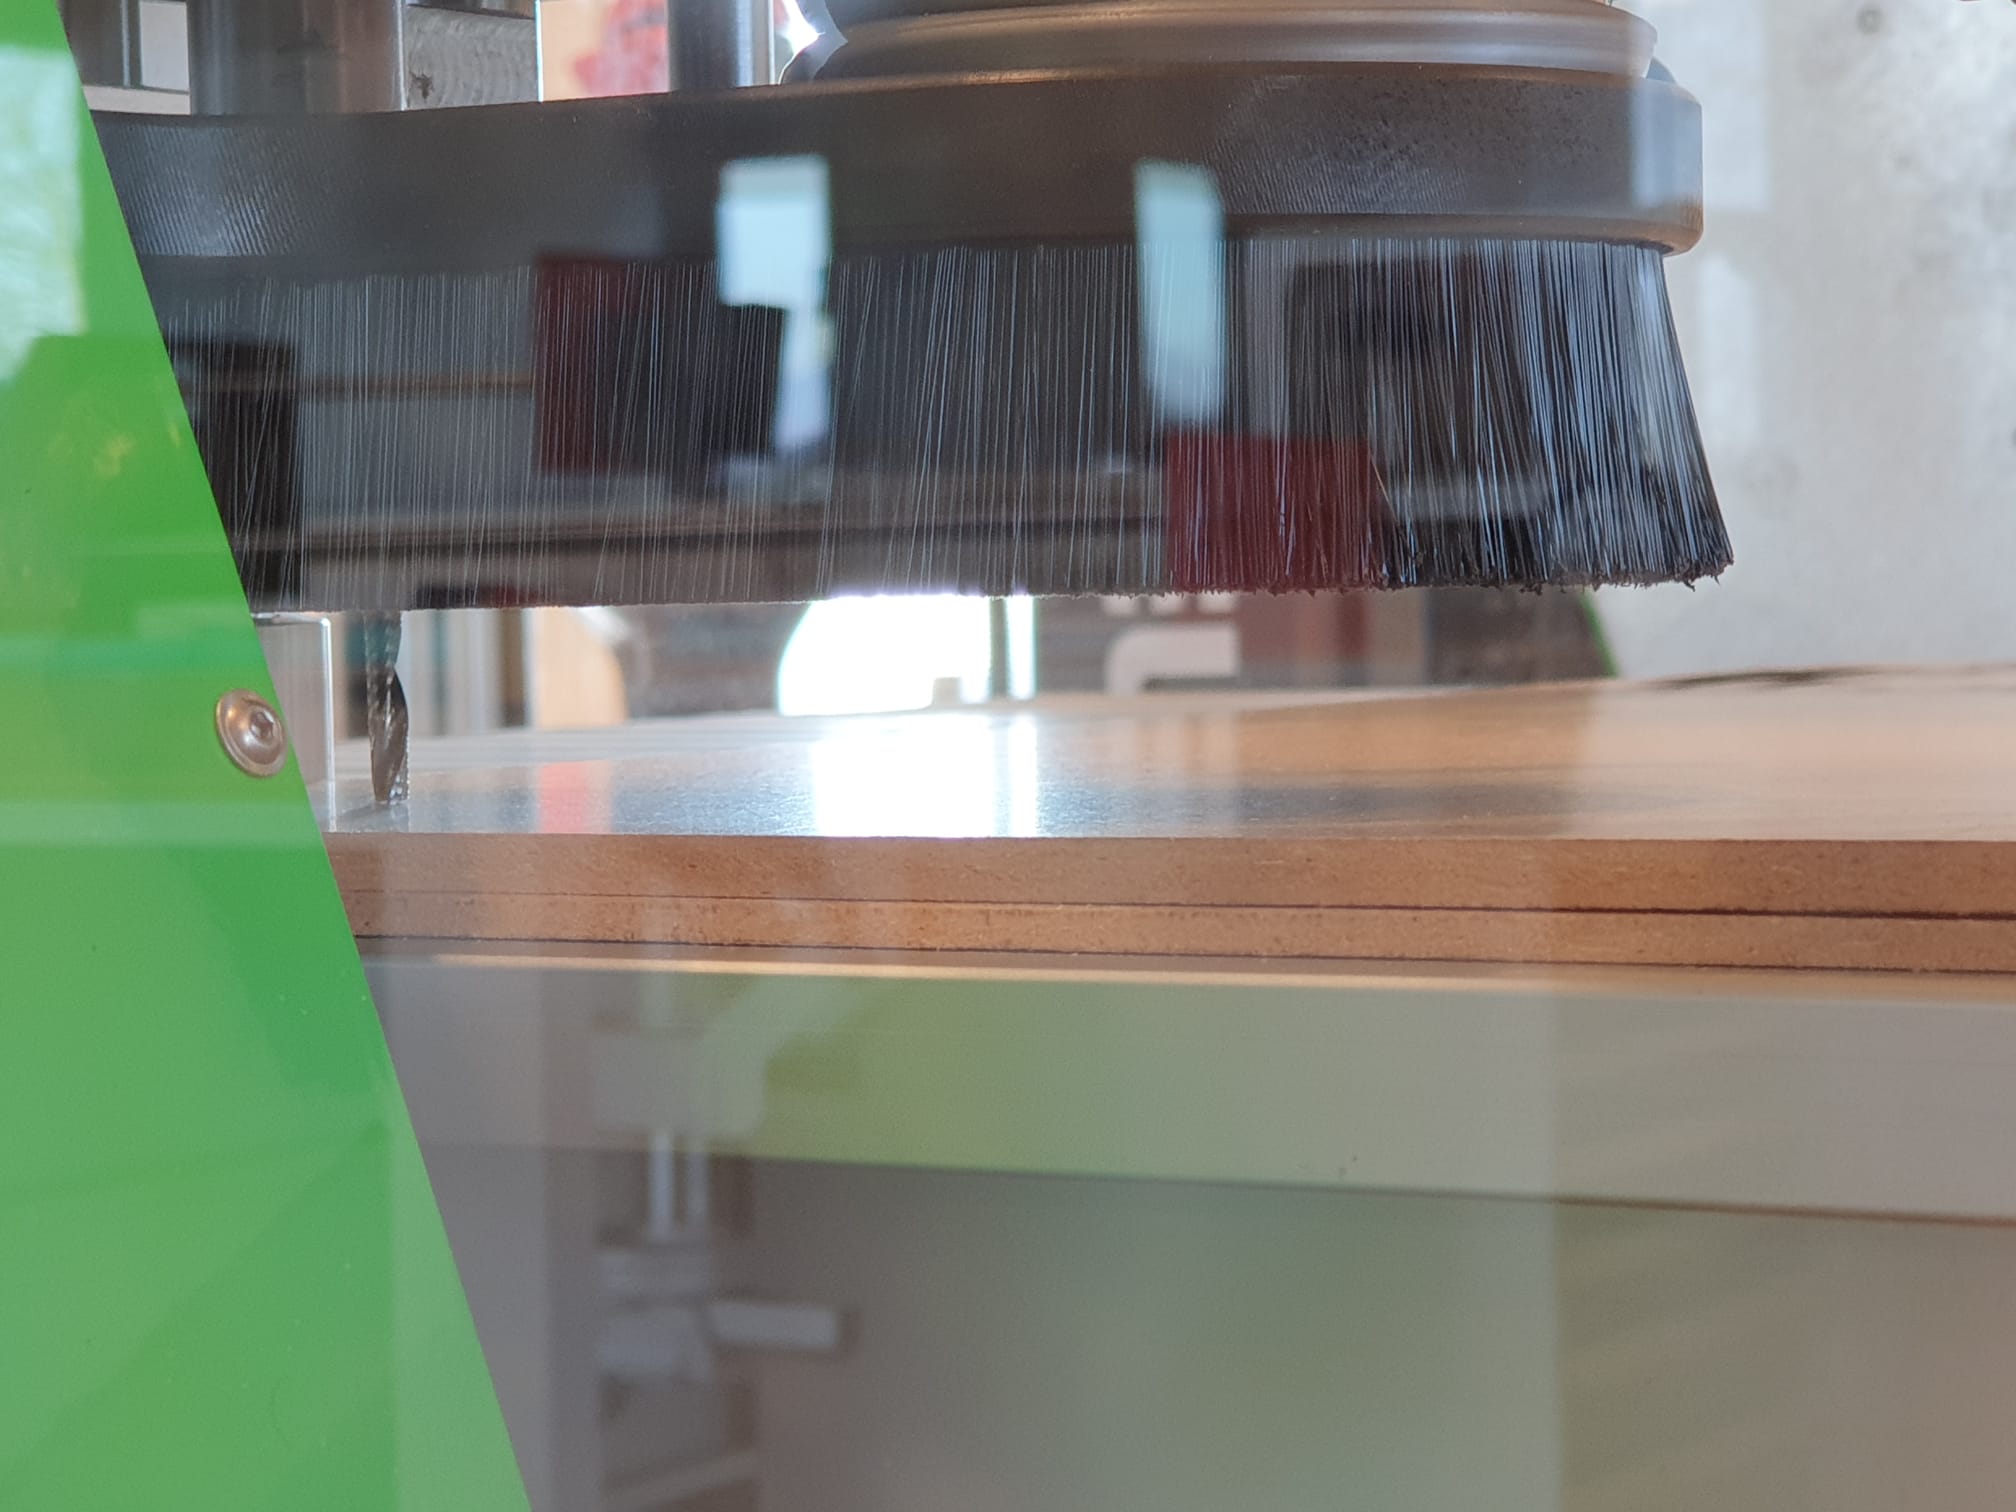
The last thing to do, before we move on to the computer for the start of the machine, is release the knob so that the brush is released in order to have less debris during cutting.
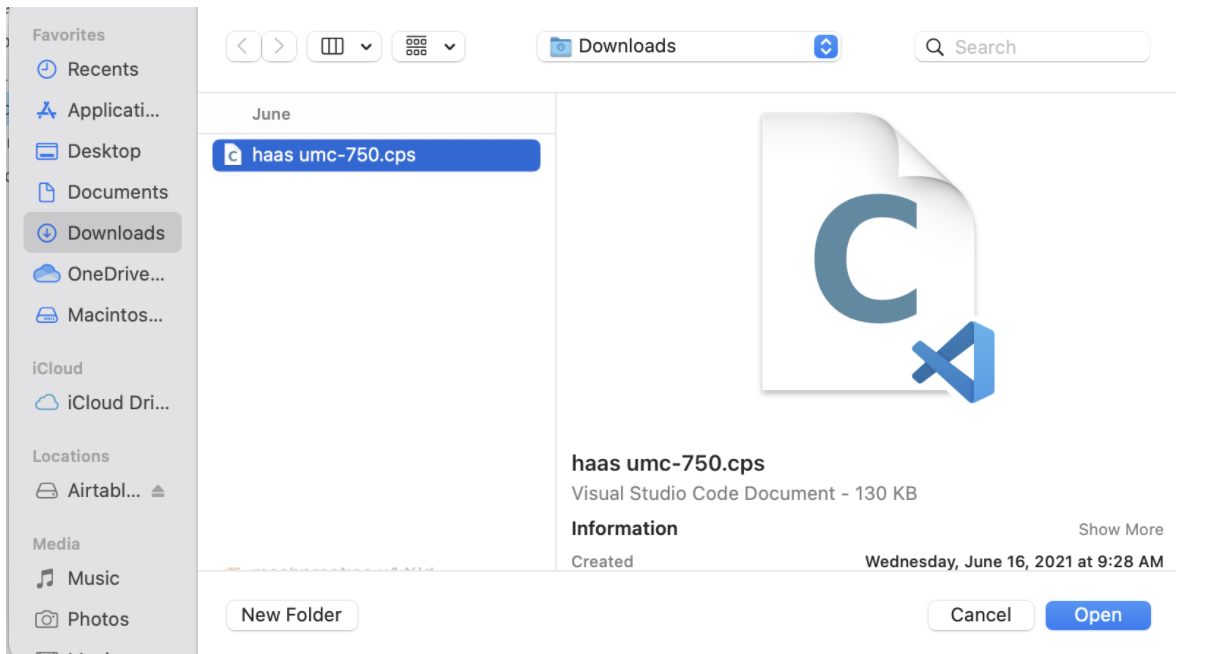
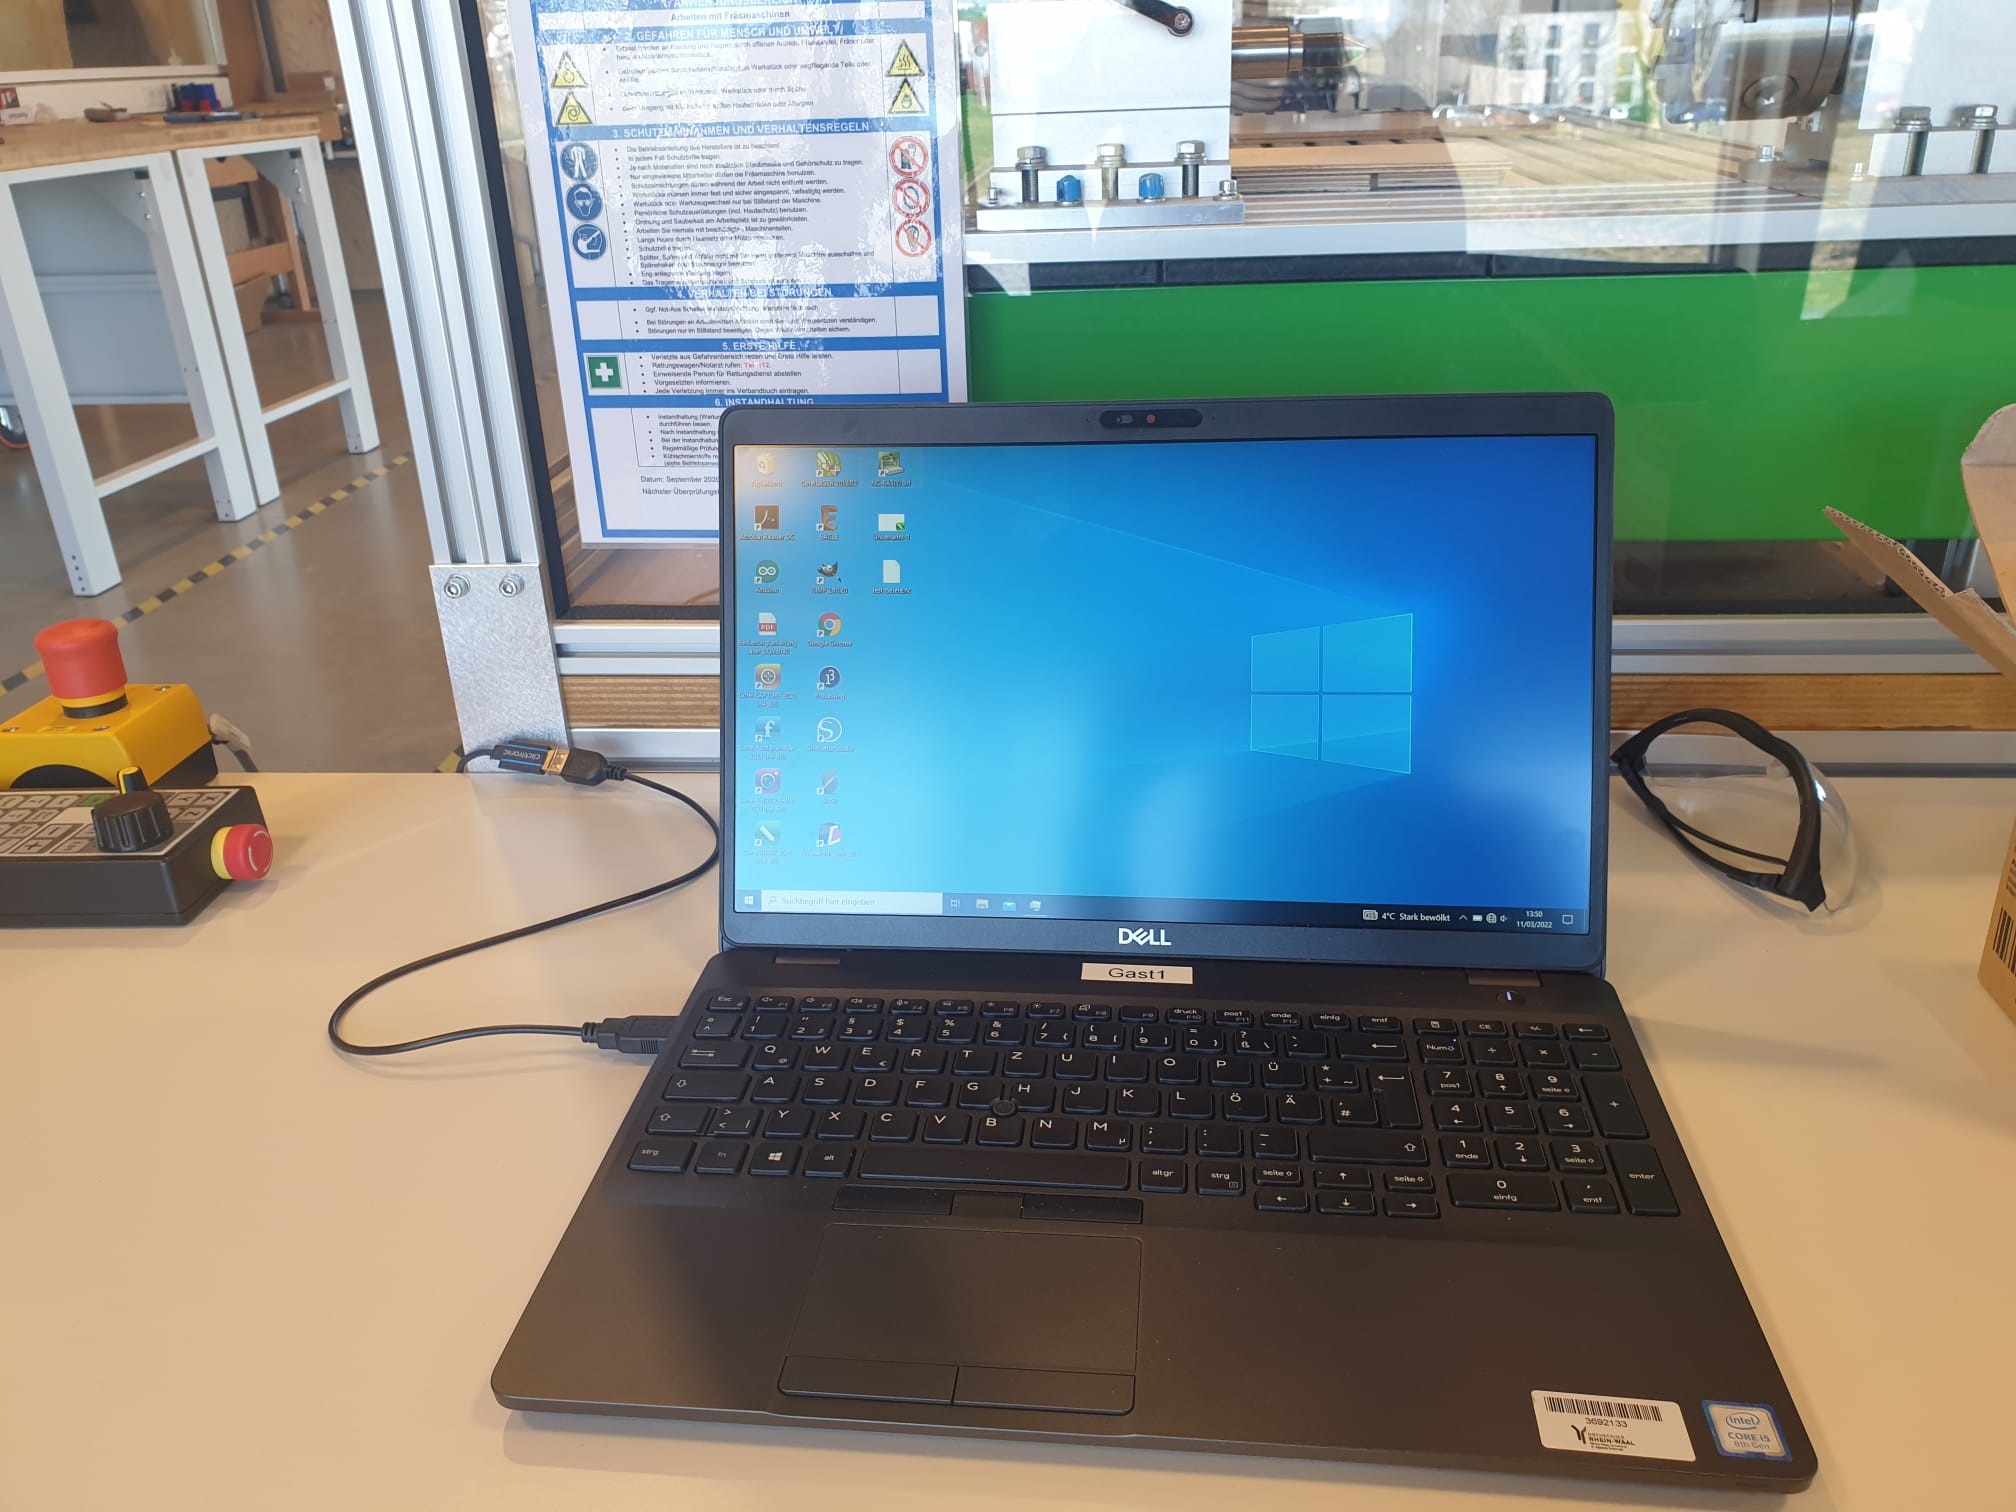
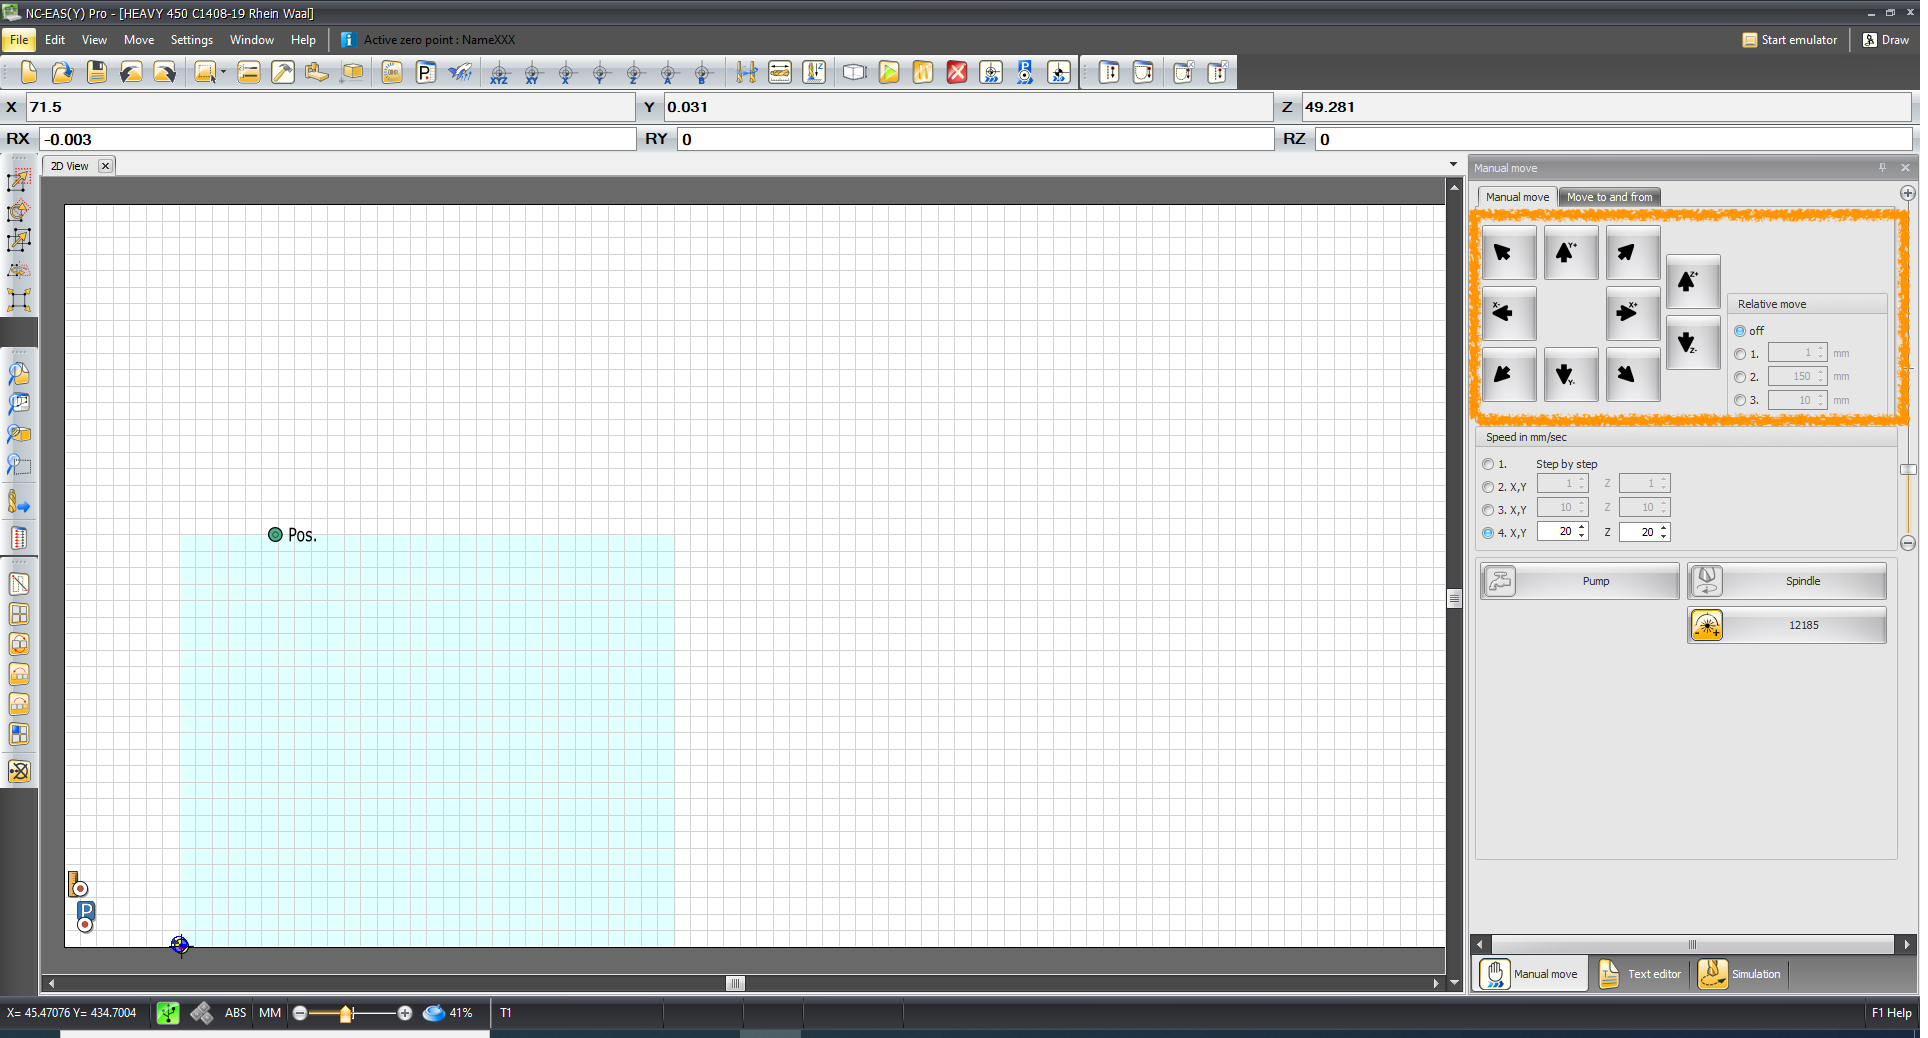
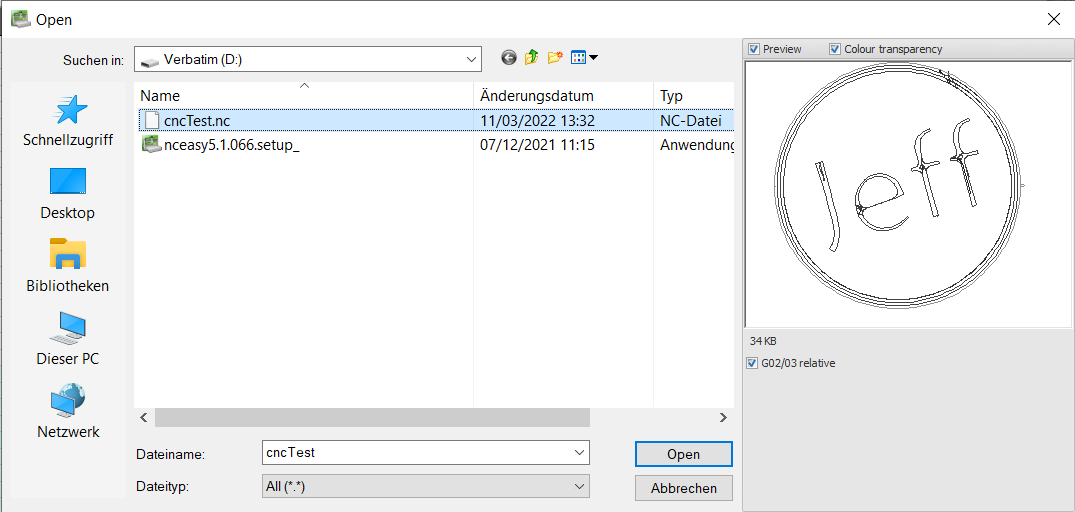
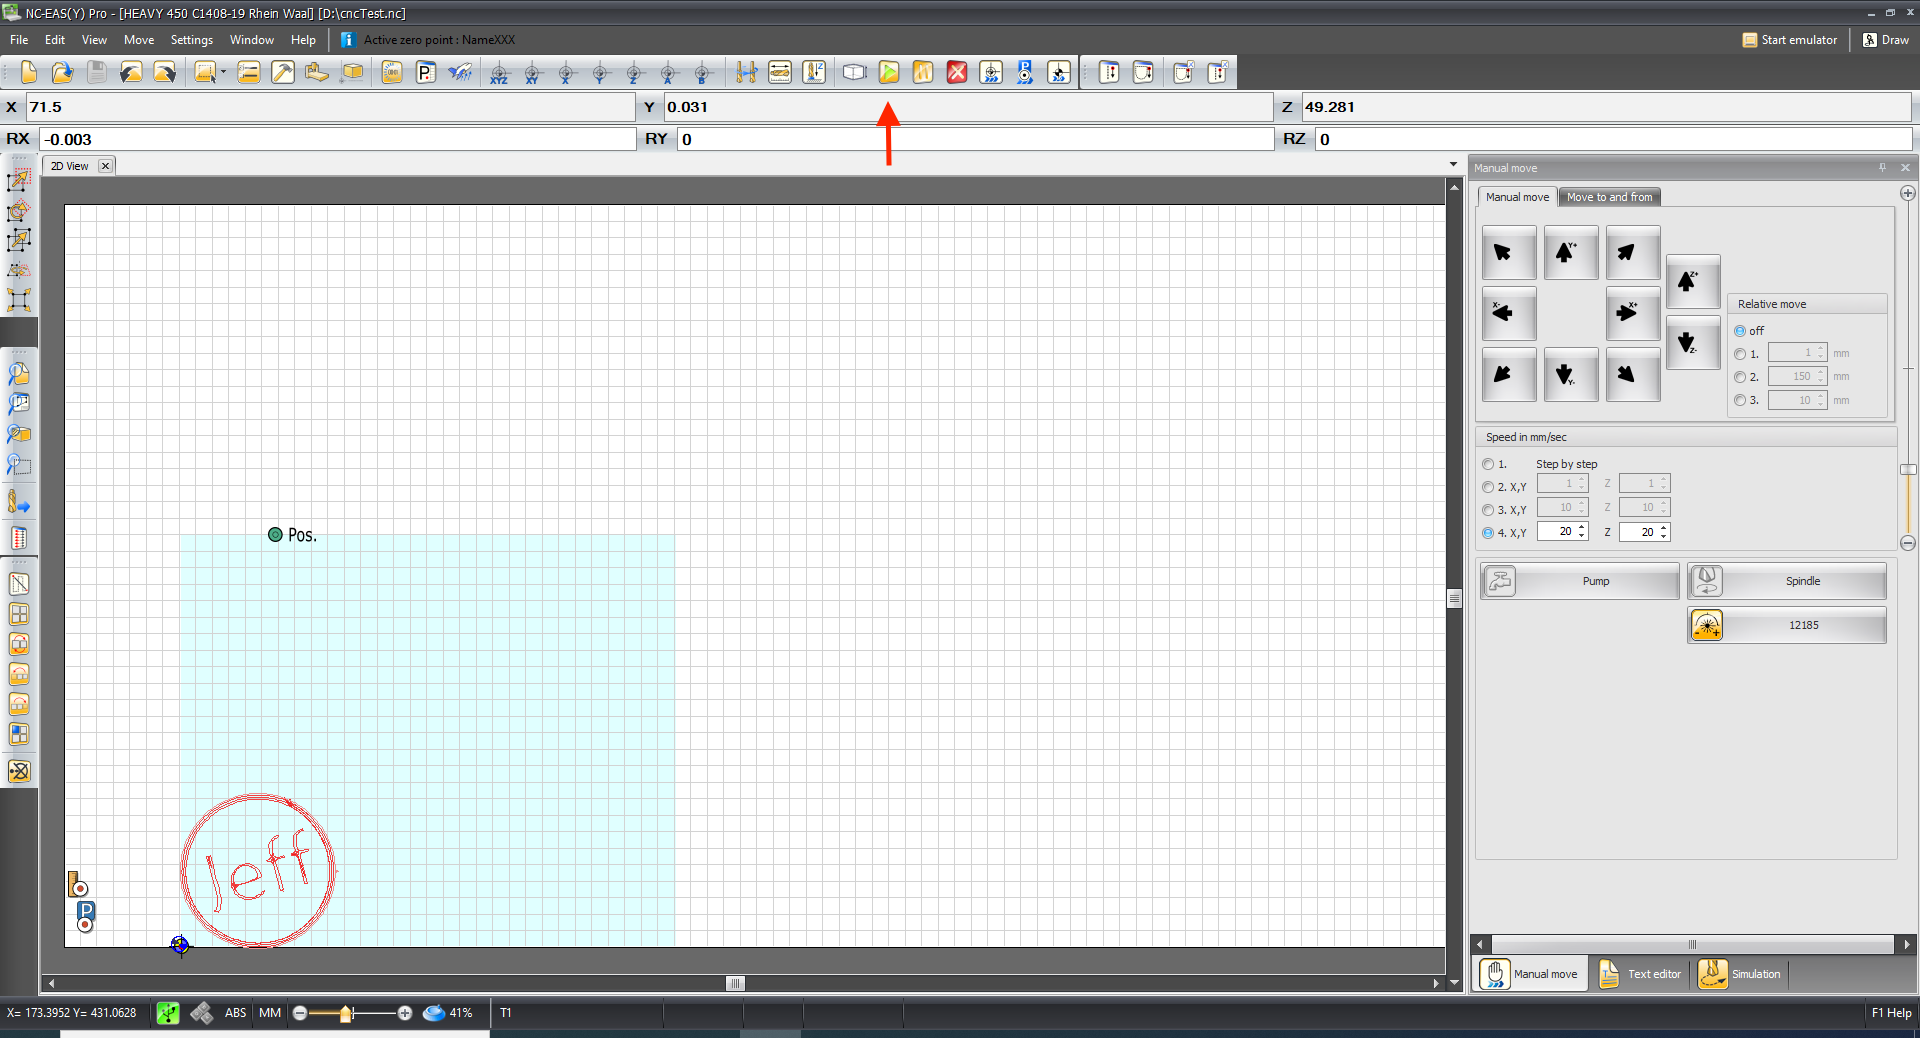
Lastly, we move on to the PC. We open the program following the NC program logo, we insert the file that we have prepared for cutting by File>Open and then we press Start either by pressing the button in the software or in the hand controller. Noticeable is when we open the program, on the right-hand side the control panel for the axes. They can also be moved by the software are mentioned before. For big steps, it is advisable to use the control in the software and for smaller increments, especially for the z-axis, it is better to use the hand controller as the increments there are way smaller. Very important is to make sure to block the doors before we press start, otherwise, the CNC machine will not start.
![]()
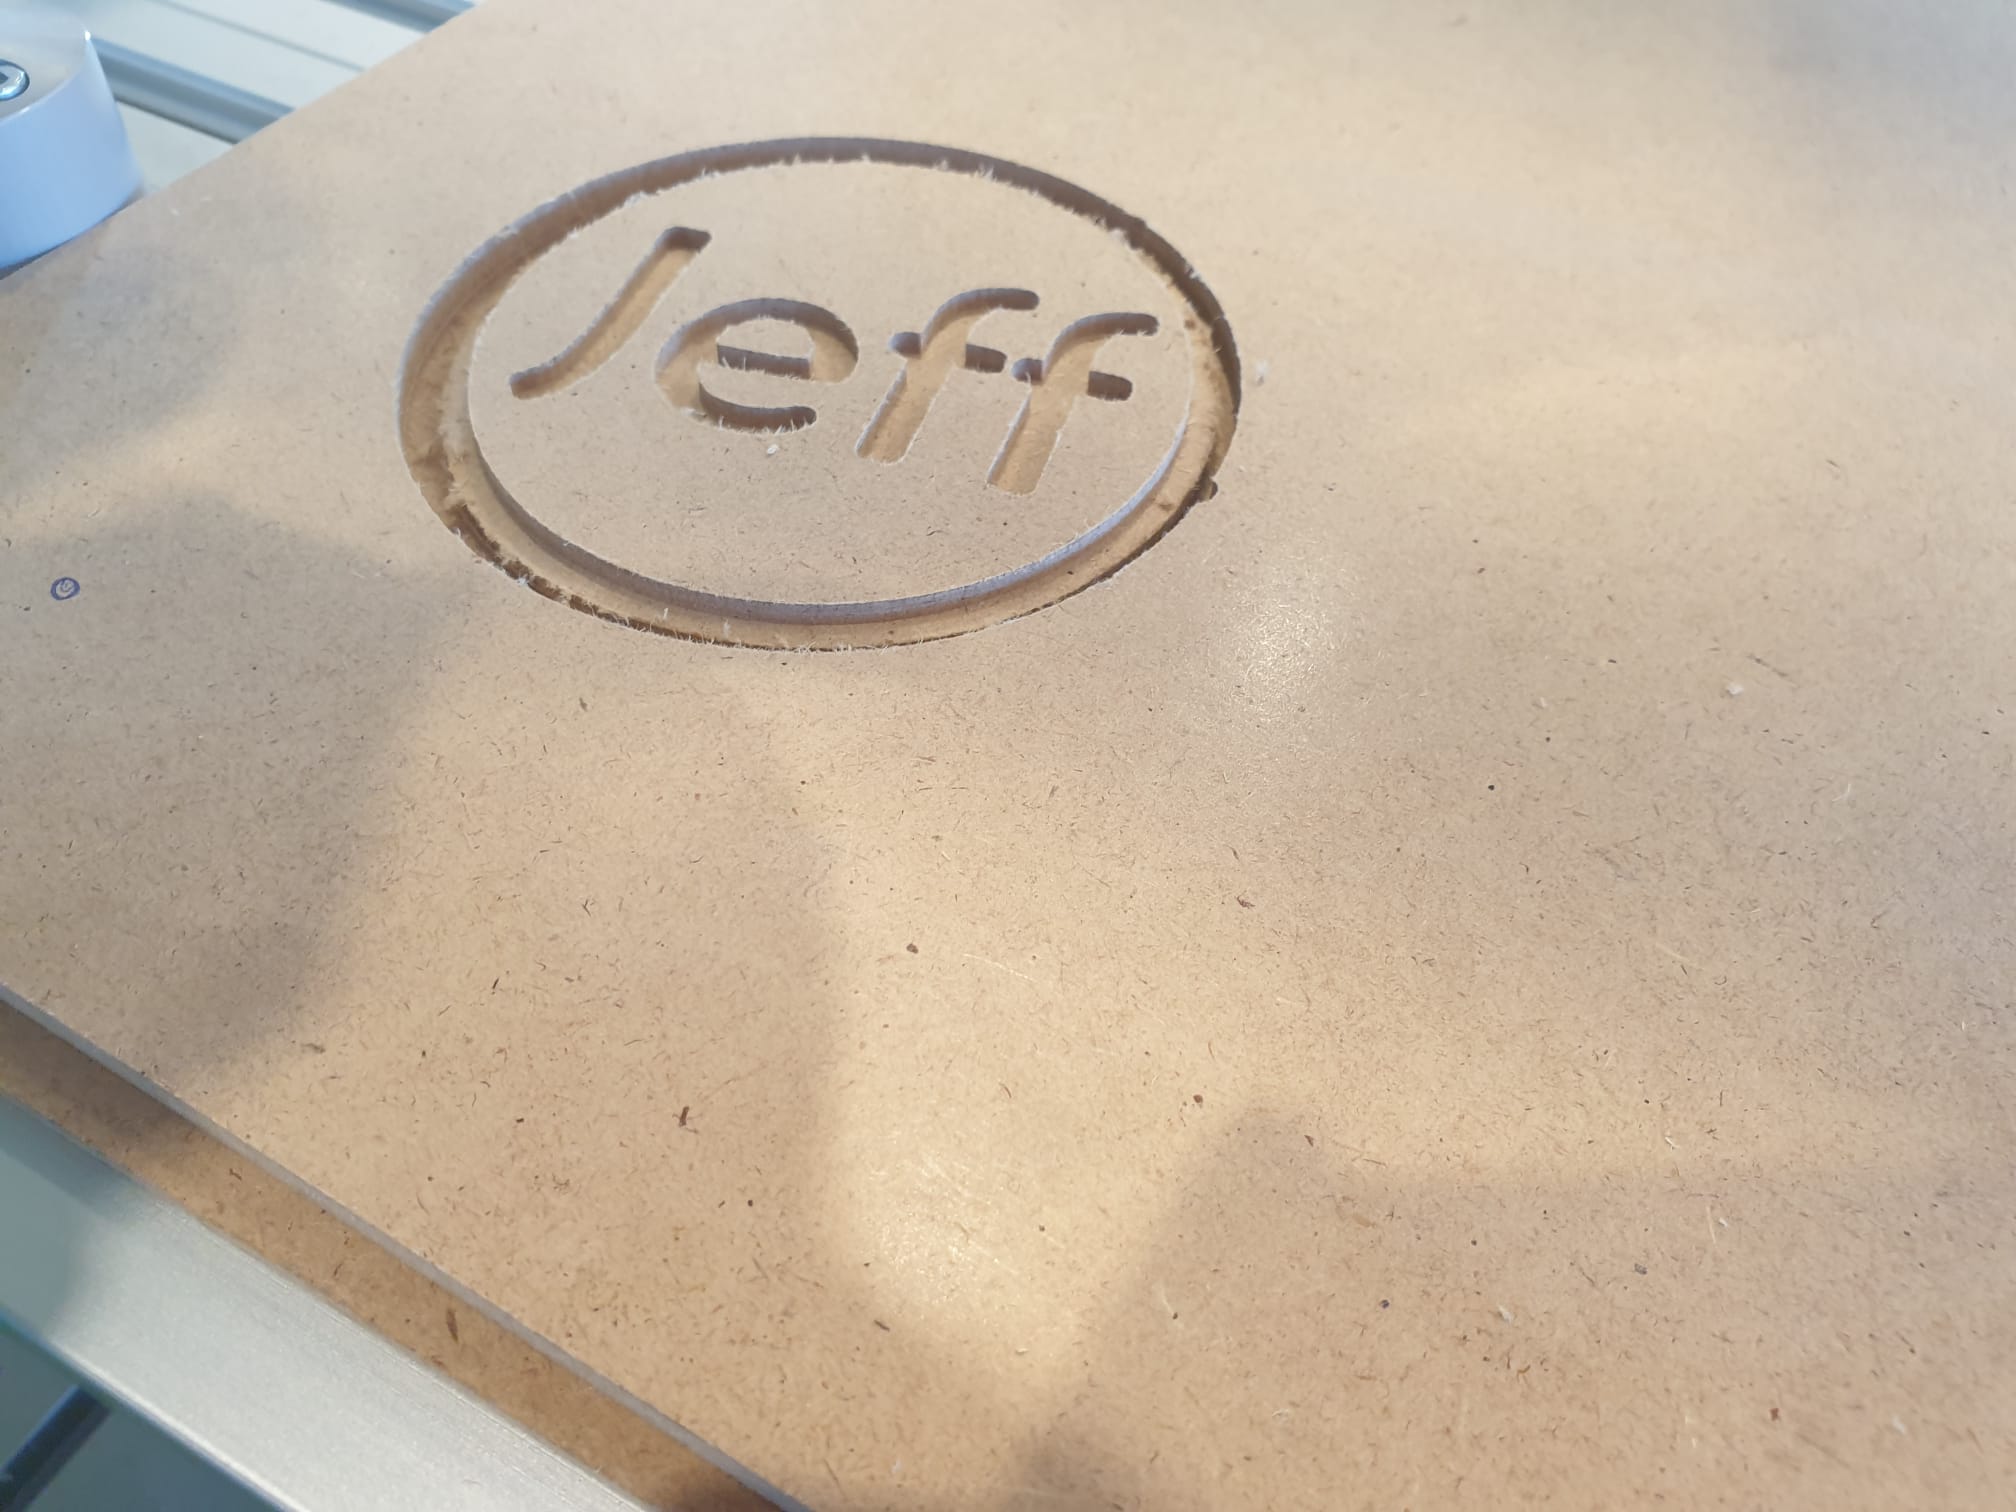
Lastly, do not leave the CNC machine unattended at any moment while it is working. If needed to go, ask someone else to be there instead. So, finally, after releasing the doors when the CNC was done and vacuuming the leftover debris, this was the end result.